
All the tips you need to win more matches on Austria.
Our CS:GO Austria guide contains everything you need to dominate on this map, including general strategies, angles to hold, smokes and wallbangs.
Austria has recently been added to the Competitive map pool and currently sits in the (Casual) Delta Defusal Group alongside Cache, Cobblestone, Inferno and Mirage. This bomb defusal map first surfaced back in May 2017 as part of the Operation Hydra event, and offers a mixture of long walkways and tight corners.
This guide will outline everything you need to know about Austria, so you can jump into a Competitive match with confidence. It covers the basics of team strategies and angles, to more advanced tactical decisions such as smokes and wallbangs.
This article contains additional reporting by Christian Vaz
Team Strategies & Angles
CT
As with most maps, playing as a CT requires you to remain alert and patient while you wait for the T-side players to approach. Splitting your five team members across the map is relatively straightforward, with the most popular strategies requiring two players to hold angles close to each bombsite. This leaves the final player to hang around the middle area of the map before rotating to whichever bombsite the Ts settle on.
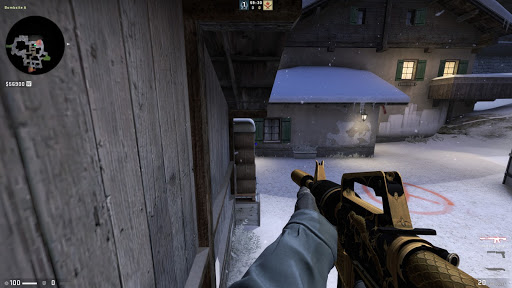
If you’re keen on holding Bombsite A, standing on the right side of the crate of boxes on the bombsite will give you a good view of Long A and Side Entrance. We recommend that you hold this position with an AWP, peeking as and when you feel it’s safe. Standing on the left side of the boxes also works and will offer more cover. For those looking to hold a less aggressive angle, jump up on the box next to the wooden shack and crouch here to catch approaching Ts off-guard, or wait on the stairs on Ramp to check angles on both the left and the right.
Bombsite B provides players with a bit more freedom and as the site itself is so small, it’s common for one player to push slightly further away to watch Fountain. Balcony is a popular spot for players to hold as it provides cover and a solid fall-back route while enabling you to gain valuable information regarding the enemy team. Ts heading towards Fountain may continue on to Bombsite B, or they may divert into Front Entrance to head to Bombsite A. So, even if you fail to eliminate them, you can alert the rest of your team on where the Ts are heading.

Lingering on Bombsite B outside Shed or standing in Front Yard watching the corner that leads around to Fountain are also viable spots, providing that you have someone on Balcony blocking the entrance to House. If your teammate on Balcony is eliminated, consider watching the House doorway from inside Shed, or if you’re feeling confident, holding the corner facing Balcony from inside House. Players that prefer to keep to the middle area of the map may hold angles at Window or may lurk in Lobby to peek Fountain. These spots will allow you to rotate quickly.
T
On T-side there are two big decisions that you’ll need to make at the beginning of each round: which bombsite you’ll be going to and whether or not your team should split up. Rushing sites with all five players usually consists of Ts heading down Long A to Bombsite A or storming through Fountain and along Street or Balcony to Bombsite B. While rushing can win rounds quickly, it can also lose them just as fast. Splitting up and gathering information while your entry-fraggers fulfill their roles can help you to decide which site is a safer bet.
Taking an AWP to peek the top of Long A could result in eliminating a CT waiting by the crates, and back-up from a teammate will also mean you have someone who is able to check Side Entrance and potentially push up Ramp.

Similarly, if your heart is set on taking Bombsite B, clear Balcony from Fountain and then split up to access the bombsite. Sending a couple of players on the outside towards Bridge and River, while the others storm House will reduce the risk of your team being wiped out quickly. Ensure that the bomb carrier is not the first one onto the site and use smokes to make it more challenging for the CTs to retake the site.
Smokes
- Balcony (One-Way)
- Difficulty: Easy
- Team: CT
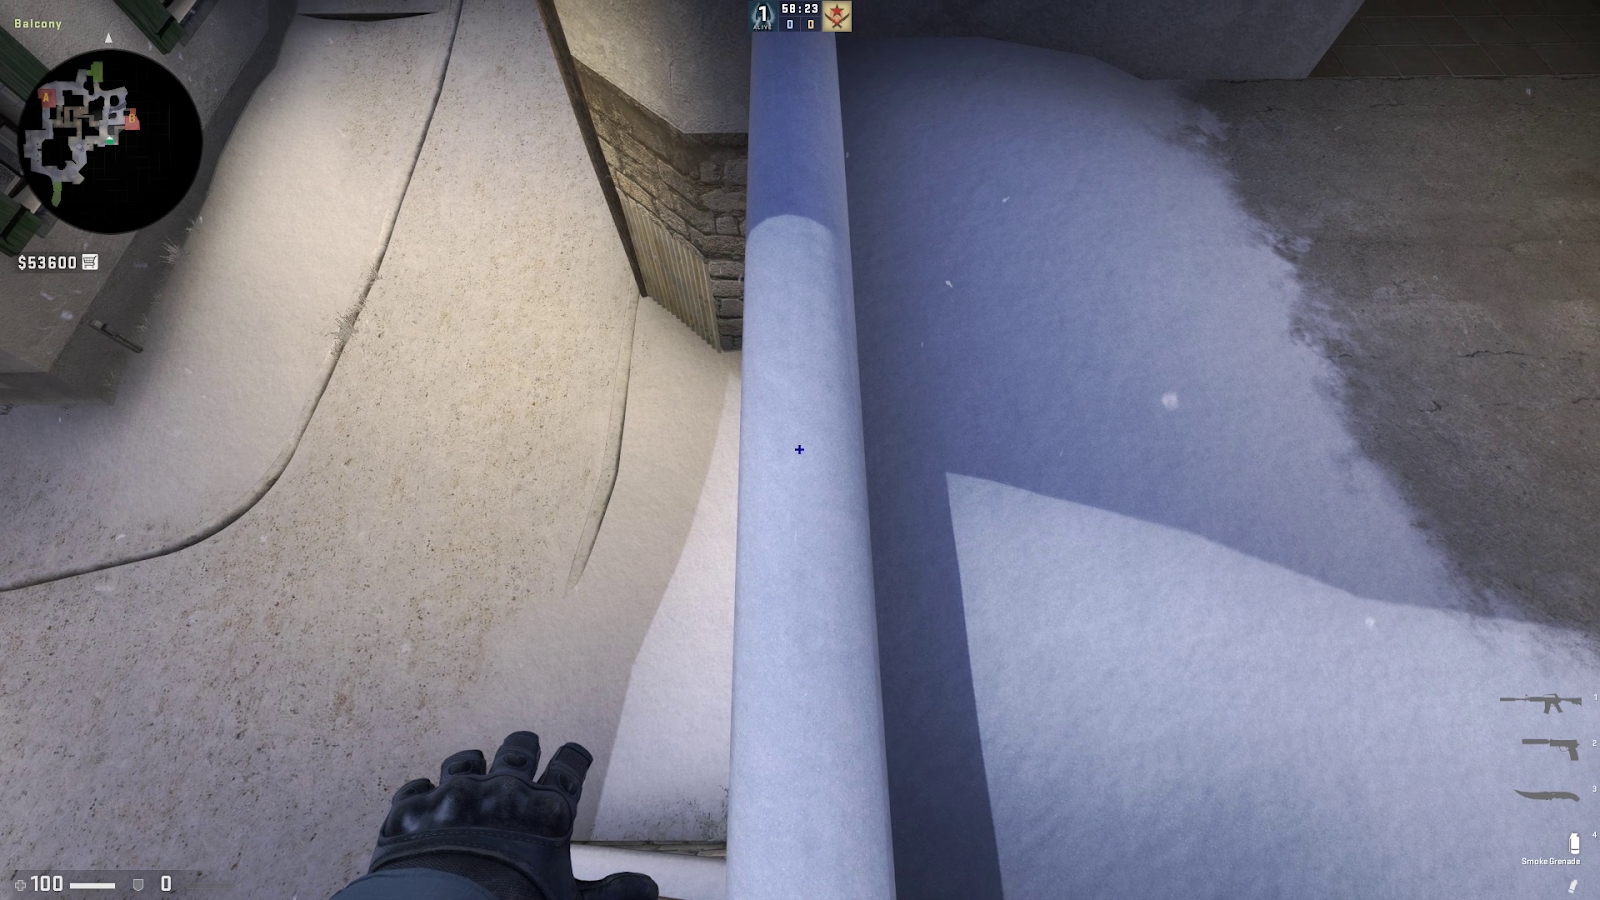

Once situated at Balcony, jump onto the ledge and spin so that you’re facing the house. Look down at the ledge and ensure that your crosshair rests in the centre of the ledge, while also lining up with the corner of the shadow on the floor. Right click and release to place the smoke. Now jump back down to Balcony and crouch next to the house so that you can peek through the tiny gap in the smoke and watch Fountain.
One-way smokes make it very difficult for the enemy team to see where they’re being shot from. If you happen to have the M4A1-S equipped, this will make it even more effective. Ts approaching Fountain will not be able to spot where the shots are coming from, giving them little time to react before you take them out. Your smoke will last fifteen seconds once it lands so you can afford to wait a few seconds after spotting the first T to see if more are taking the same route via Fountain. Waiting a second or two can be the difference between eliminating one enemy or potentially eliminating an entire team.
- Fountain to Bridge
- Difficulty: Intermediate
- Team: T
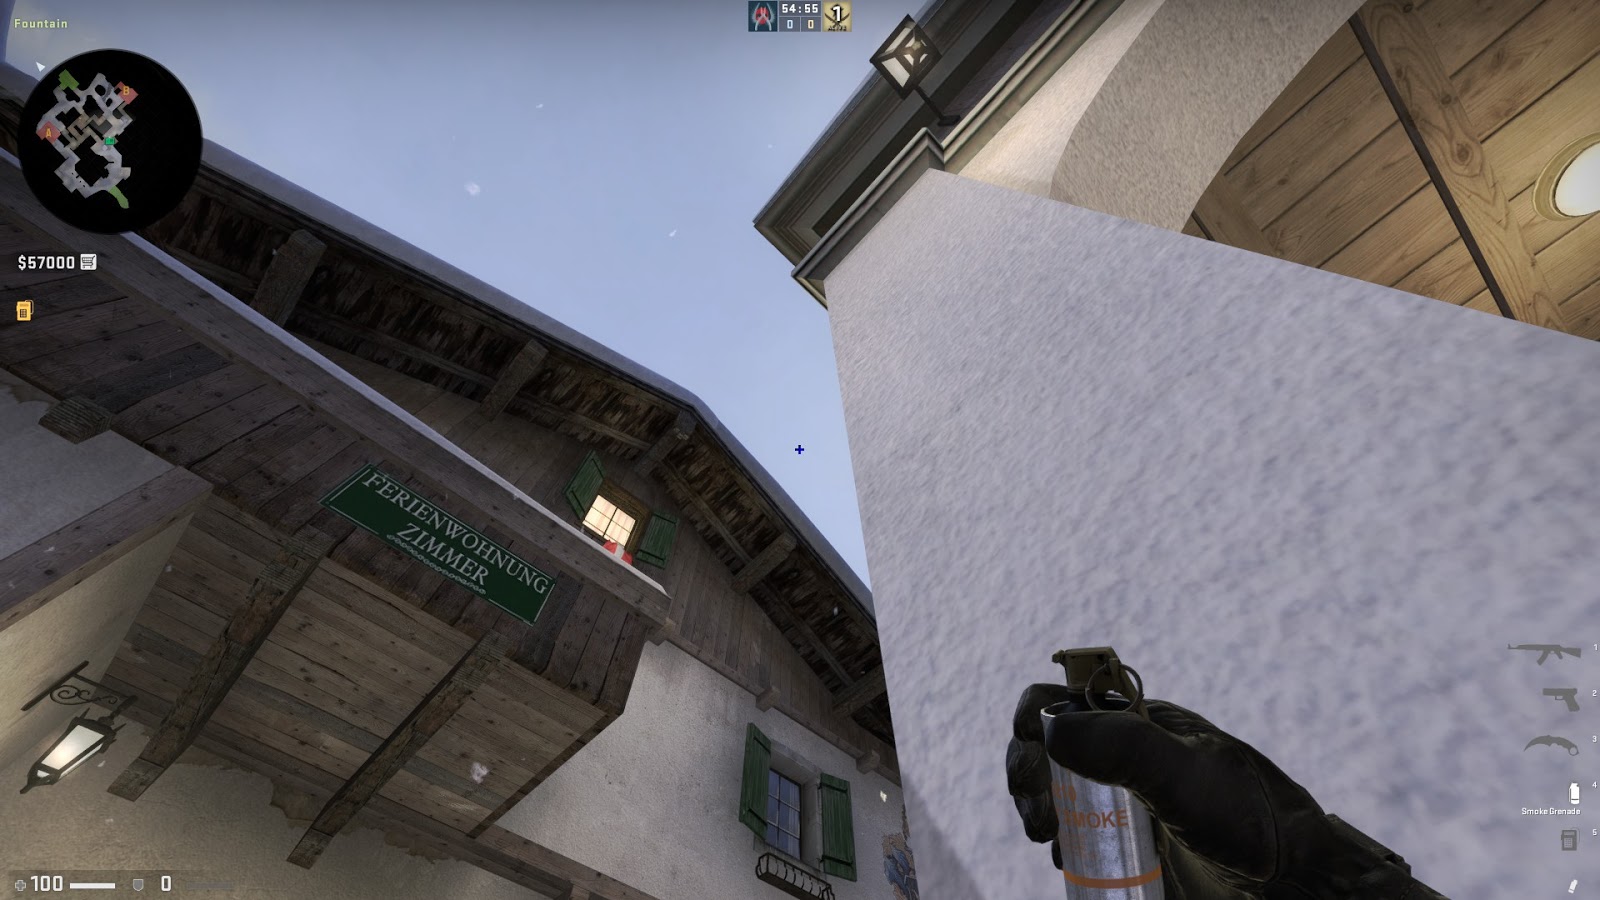

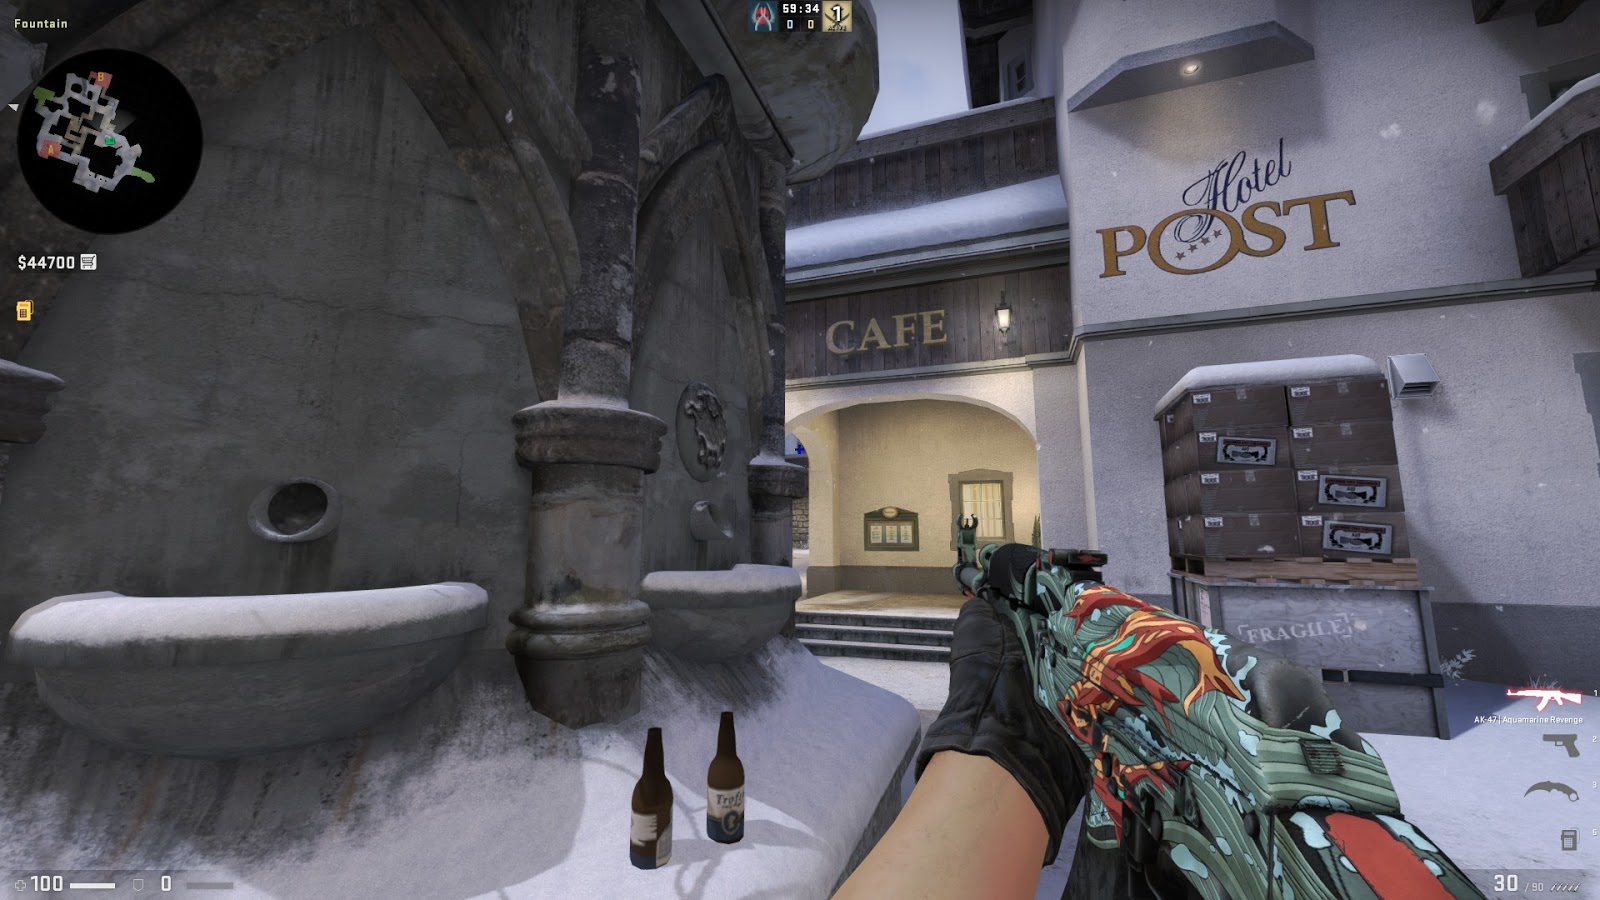
From Fountain, walk over to Cafe’s exterior white pillar and push yourself up against it. Turn to face the building with the German sign on the front. Position your crosshair on the peak of the roof and drag it sideways so that it’s also in-line with the top-left corner of the first beam on the right side of the roof. Your crosshair will be resting in the sky. Release the smoke with left-click and prepare to peek the corner opposite Bridge.
This smoke should make it a lot easier for your team to take on Bombsite B as it removes threats from Bridge. Try to encourage your teammates to smoke off River and House as you move into Bombsite B to minimise the angles you’ll need to worry about when planting the bomb.
- Bombsite A
- Difficulty: Expert
- Team: T
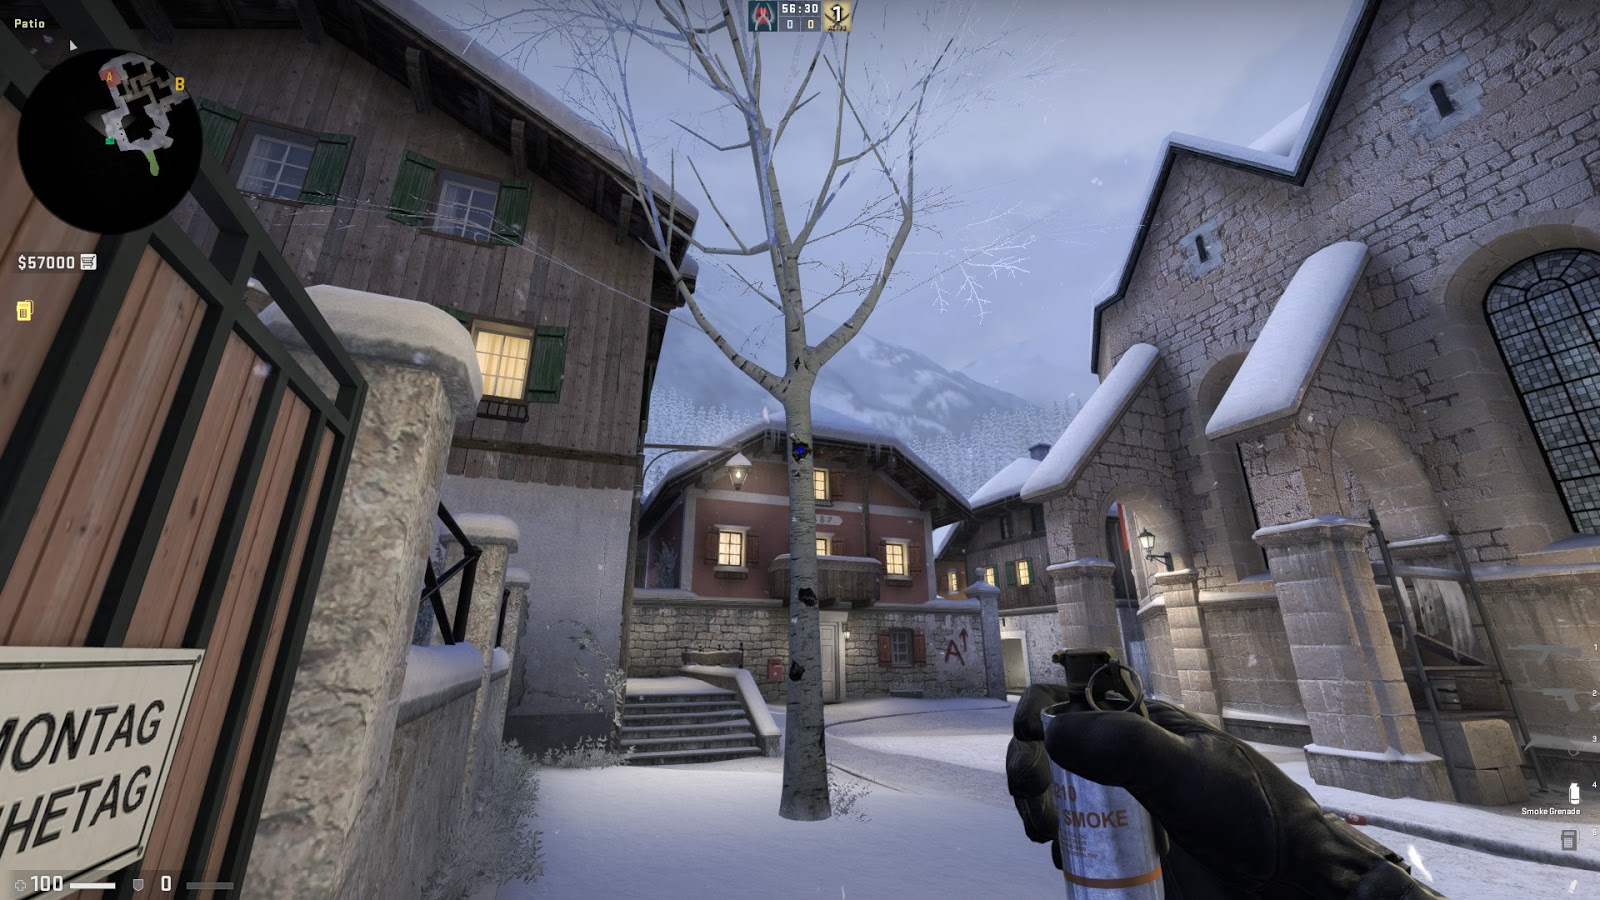

This smoke is performed in an area known as ‘Patio’, which is the strip of land that runs parallel to the Church leading to Long A. Walk over to the gate labelled ‘Montag Ruhetag’ and push yourself into the corner between the wall and the gate. Turn to face the white tree ahead and rest your crosshair in the middle of the top black dot (there are three). Jump, releasing the smoke with left-click at the peak of your jump to smoke off the left side of Bombsite A.
While this smoke may require a little bit of practice, it’s definitely worth learning. Smoking off the left side of Bombsite A reduces the number of angles you’ll have to clear as you attempt to takeover the site. You’ll have to be prepared to move quickly after sending out the smoke as waiting too long to push could result in the smoke dissipating before you’ve cleared the site. In addition, if you are able to consistently land this smoke, it will make it a lot easier for you to learn jump smokes on other maps, which will give you a considerable advantage against the enemy team.
More popular CS:GO guides:
- 1. Guide – CS:GO – Guide 2018
- 2. Best Weapons – CS:GO – Best weapons 2018
- 3. Recoil Control – CS:GO – Recoil control guide
- 4. Crosshairs – CS:GO – How to change crosshair
- 5. AWP – CS:GO – AWP guide 2018
Wallbangs
Well-placed wallbangs give you the opportunity to check angles and spots that you are unable to see from where you are currently standing. In many cases, wallbanging is the safest way to check a spot as you’ll be on the other side of the wall and can fall back quickly to avoid reactionary fire. Wallbangs are proven to be most effective when performed using an AWP, however some may suit AK-47s or M4s too.
- Long A to Bombsite A Box
- Team: T
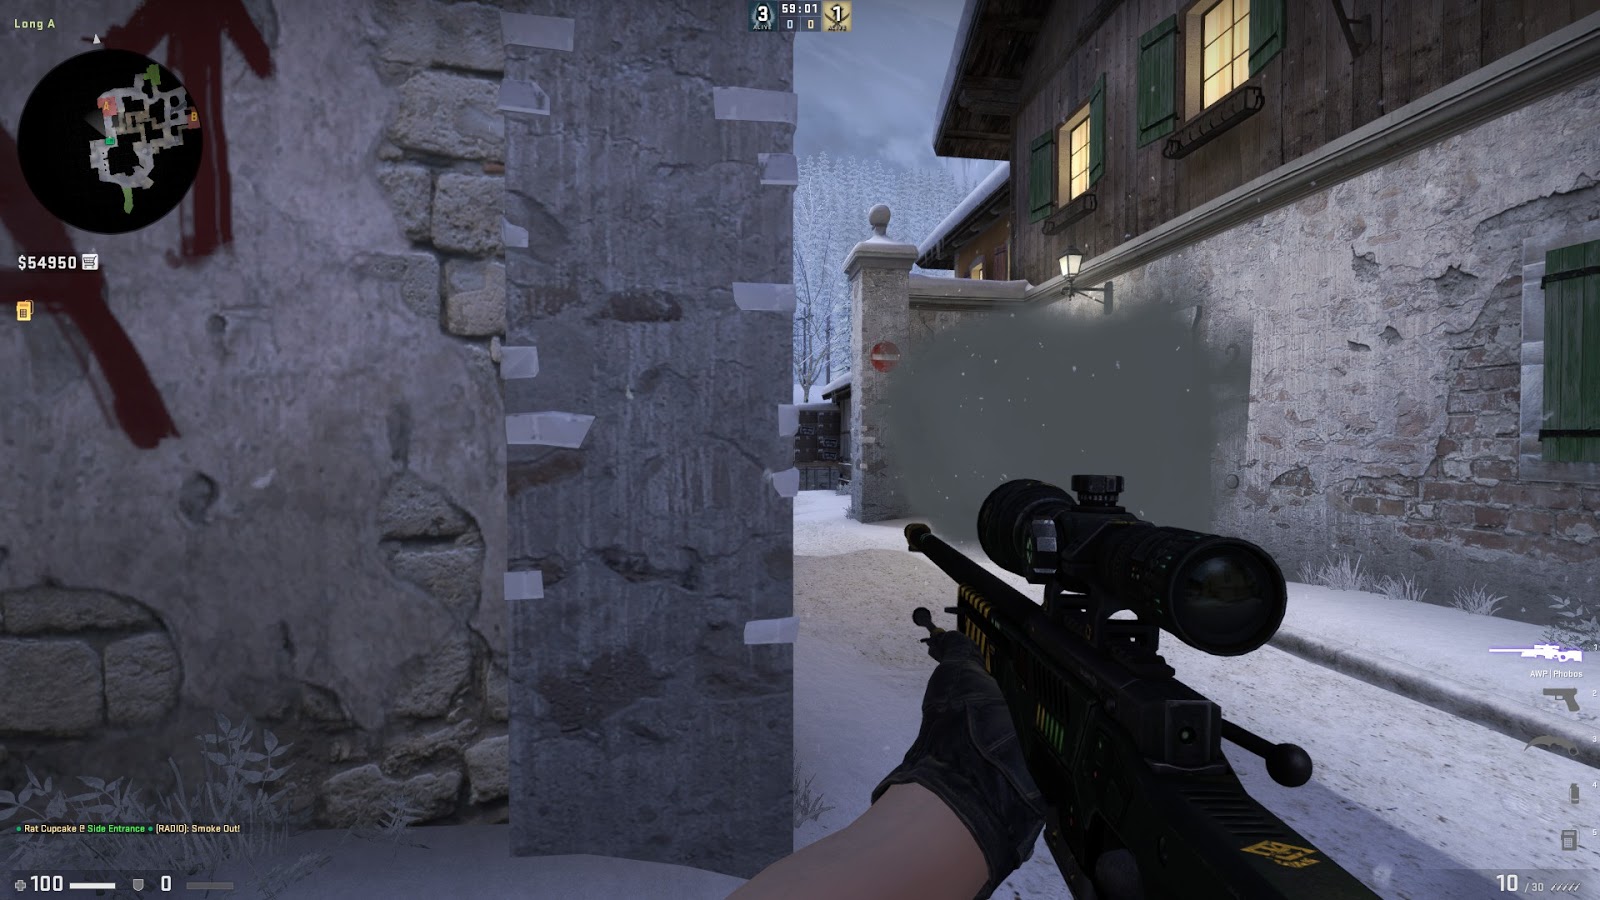

Go to Long A and stop just before the the stone wall. Ensure that a teammate is covering the doorway on the right side or alternatively, smoke this area so that you’re protected. Edge out past the pillar and stop once you can see the stack of boxes on the right (just past the no entry sign). Focus on the left column of the boxes, crouch and scope in on the bottom box. Aim on the bottom right side and shoot. You may want to take a couple of shots, adjusting your crosshair slightly each time to ensure you’ve hit any potential targets before moving away.
Wallbanging this stack of boxes will take out any CTs guarding the bombsite from the back of the site. CTs will often stand here as it allows them to wait for Ts to approach from Side Entrance (in the house) and A Long, while also giving them the freedom to turn to Ramp. Deterring them from holding this angle will drastically limit angles they can hold on Bombsite A.
- Bombsite B to Shed Wallbang
- Team: CT
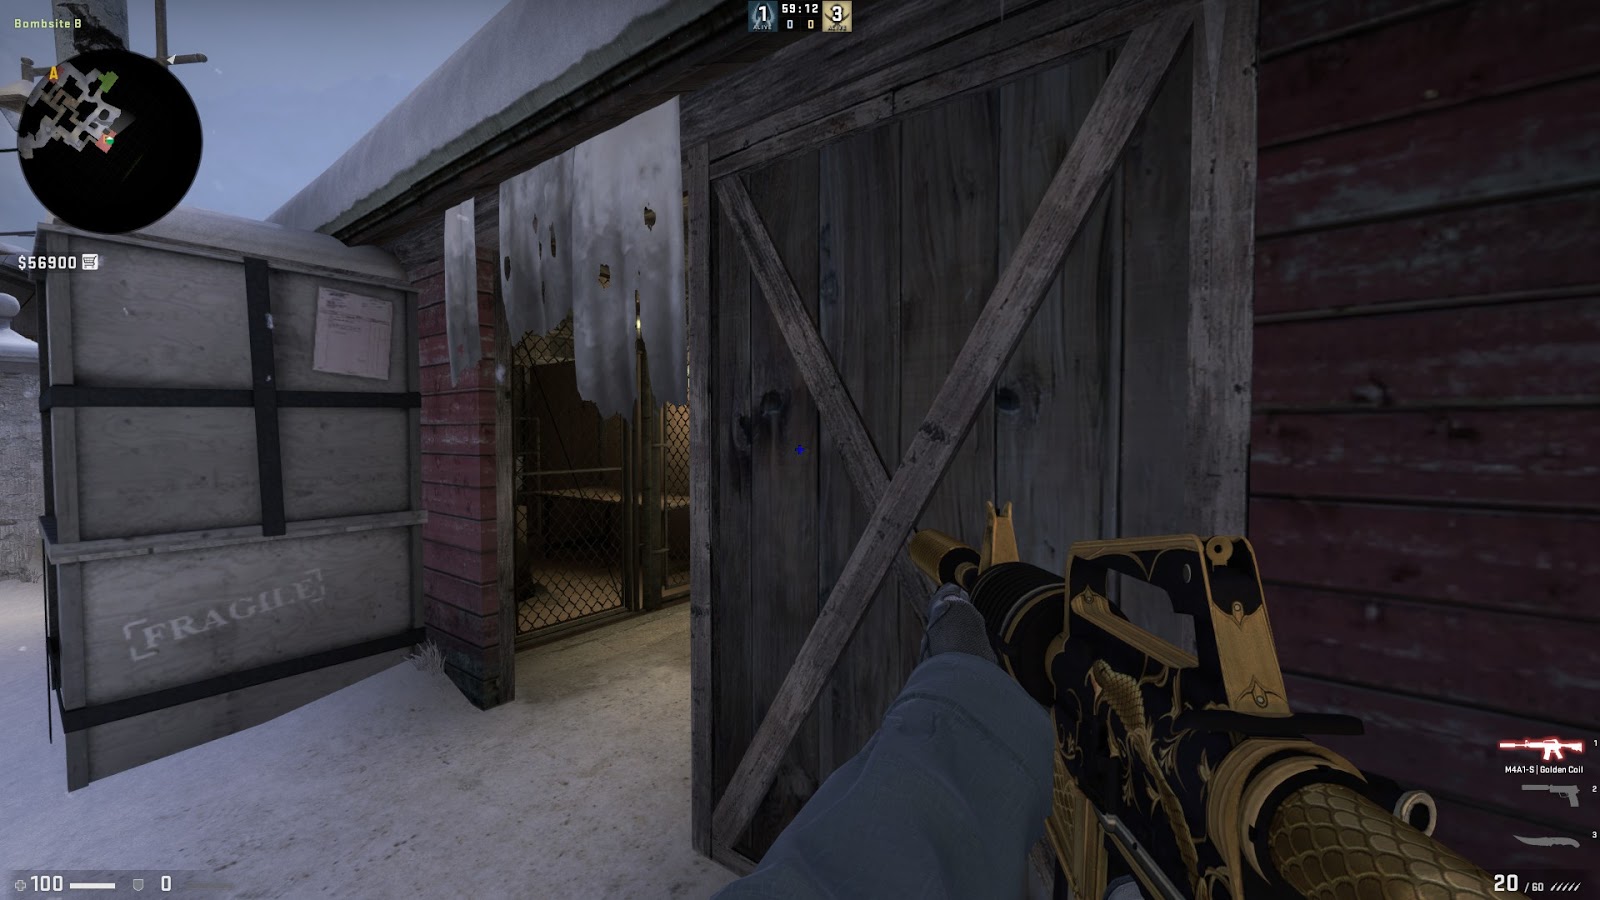

Head over to the Shed on Bombsite B. This wallbang is very easy to achieve as you can line up your shot before the enemy arrives. Peek the corner at the top of the ladder and place your crosshair where a standing enemy’s head would roughly be. Strafe back to the right so that your body is entirely covered by the wooden wall without moving your crosshair. You should find that, depending on how far away you stand from the Shed, your crosshair will usually rest to the left side of the ‘X’ shaped planks on the wall. Begin shooting in bursts when you hear an enemy approaching.
After trying this wallbang a few times, you should be able to visualise the inside of the Shed without having to peek. Sending out shots in short bursts may result in you taking out multiple enemies at once, specifically if they are trying to rush through Shed, although beware of enemies shooting back at you through the wall.
