
Destiny 2: Fury walkthrough guide – How to kill Modular Upsilon and Modular Sigma
Our essential walkthrough for completing Destiny 2's Fury mission.
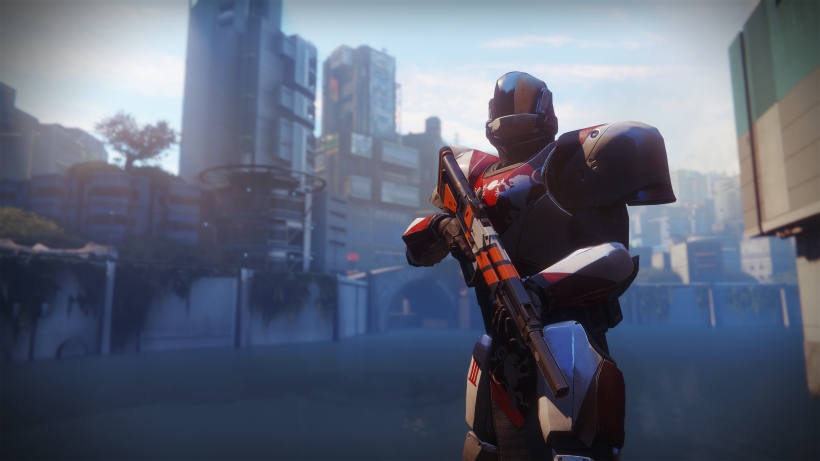
Our Destiny 2: Fury guide contains tips for killing Modular Upsilon and Modular Sigma, as well as a step by step walkthrough for the rest of the mission.
Destiny 2’s Fury mission houses one of the toughest boss battles yet and sees you taking on hordes of Vex enemies. It’s a fight to establish control of the drill site so you can expose the vault that lies behind it – be warned though, it’s quite the challenge.
With that in mind, we’ve compiled a complete walkthrough for this next mission. Note that this is the first iteration of our Fury guide and we’ll update it over time with screenshots, gameplay footage and further details in the near future. Stay tuned for more very soon! You can find links to other missions towards the bottom of the page.
Editor’s UPDATE #2: We’ve updated this article with a couple of extra tips for dealing with the final boss fight. We’ll continue updating this guide with more tips and tricks so stay tuned for more!
(If you want to be the best at every area of the game, don’t forget to bookmark our PVP, Strike and Subclass guide pages – they’ve got everything you need if you want to get more out of Destiny 2, and will be continuously updated in the weeks ahead.)
Get to Excavation Site II
From this mission’s starting point, make you way to the Giant’s Scar. Here you’ll find Taken battling the Vex near the entrance. You can either sit back and watch the carnage unfold, or you can dive headlong into the ensuing chaos.
If you’re after the quick and easy route, run through the hordes of enemies, go up the ramp and enter the base entrance. Turn right and head up another ramp before looking out through the window at a huge mining drill.
It’s at this point that the Vex will start teleporting into your vicinity, so switch to an energy weapon right away and deal with the Minotaur’s shields. Switch back to another weapon and focus them down, then immediately move onto the Goblins.
Proceed into the next large storage chamber and take out the Hobgoblin to your left. Now use the entrance as cover and whip out grenades or an explosive power weapon to destroy the horde of Vex advancing on your position.
Inspect the orange computer terminal when the coast is clear and head out of the exit just below the terminal itself on the right. Cross the drill site and continue through another entrance where you’ll descend into Excavation Site II.
Our most popular Destiny 2 guides:
The following links will take you to our most important guide hubs:
- 1. Guide – Destiny 2 Guide
- 2. Crucible – Destiny 2 Crucible PVP guide
- 3. Subclasses – Destiny 2 Subclass guide
- 4. Strikes – Destiny 2 Strike guides
- 5. Campaign – Destiny 2 Campaign walkthrough
Override the drill controls and defeat the Hydra
Move down the tunnel into the bunker and make you way into a storage room characterized by a black tower in the far-left corner. There’s a small group of Taken enemies here and shouldn’t be too difficult to take care of. Once they’re down, exit using the orange ramped corridor and go up to a Taken Phalanx.
Head into the next storage chamber and prepare for a few more enemies. Eliminate the Goblins first and utilise cover to bring down the tougher foes one by one. Use the cover and flank them from the side or behind, shooting them where it hurts the most.
Make your way up another orange tunnel and into a terminal room. It’s here that you’ll have to defeat all the Taken before you can interact with the terminal itself. Be warned as this next part can get a little hairy.
You’ll soon be swamped with many tough enemies, and it’s important not to panic here. Focus down the Taken Minotaurs first by shooting at their glowing eyes and meleeing them for a finishing combo. If you’ve got a close range SMG or shotgun, now’s the time to put it to good use.
Take on the Minotaurs next, spraying them down and lobbing any grenades you have. Once they’re taken care of it’s onto the Phalanxes. We recommend playing it cool and edging around the outer rim of the room, pop-shotting the exposed areas that their shields don’t cover.
If it’s all getting too hectic, don’t be afraid to pop your Super and unleash hell. You’ll earn quite a few orbs by doing so and it makes this section an absolute breeze.
Once the coast is clear, leap up to the ledge and access the wall terminal to override the drill controls. Now turn right, and proceed along the orange corridor and drop down into a new storage area.
There’s a pre-occupied Taken Wizard nearby, so grab the opportunity and break his shield with some Void bullets before peppering him down. Eliminate the Phalanx too and enter the next storage room which contains yet another Taken Wizard and some more enemies fighting amongst themselves.
We recommend blasting the Taken Wizard away and moving towards the raised outer-rim of the area where the storage area’s exit is located. Shoot the Harpies and Psions when they emerge and attempt to keep one or two enemies from both sides alive so the Hydra doesn’t turn on you – and instead, focuses on them.
Now it’s time to take on the Hydra while using the metal fencing as cover. Expect a few more Psions to appear once you’ve killed the Hydra, but they won’t present much of a threat. When you’re done, head back up to the drill site on the surface.

Access the mainframe
Now the drill is active, enemies will start teleporting onto the surface of the drill site. Locate the drill control cabin on the opposite side of the arena as you emerge from the bunker. Jump across to it and deal with the Hobgoblins and Minotaur – fairly easy by now, eh?
Crazy numbers of enemies will begin congregating on the dirt road below the cabin, and it’s honestly best to ignore them as your chances of survival are extremely slim. Instead, cheese it towards the central hole where the enormous drill was raised from. Look over the edge and jump to the side tunnel with metal surrounding the exterior. Don’t drop straight down or onto a lower tunnel though, as it’ll result in a very swift death.
Proceed through the narrow tunnel and into the vault chamber. Drop the Hobgoblins as you go, being mindful to keep on the move – you don’t want to be caught by their damaging beam weaponry.
Head up the steps and deal with all the trash on your way up into the mainframe core chamber. From here, head down into the center and interact with the mainframe.
Destiny 2 walkthrough content
Use the links below to access all of our mission walkthroughs:
- Mission 1: Homecoming – Homecoming walkthrough
- Mission 2: Adieu – Adieu walkthrough
- Mission 3: Spark – Spark walkthrough
- Mission 4: Combustion – Combustion walkthrough
- Mission 5: Hope – Hope walkthrough
- Mission 6: Riptide – Riptide walkthrough
- Mission 7: Utopia – Utopia walkthrough
- Mission 8: Looped – Looped walkthrough
- Mission 9: Six – Six walkthrough
- Mission 10: Sacrilege – Sacrilege walkthrough
- Mission 11: Fury – Fury walkthrough
- Mission 12: Payback – Payback walkthrough
- Mission 13: Unbroken – Unbroken walkthrough
- Mission 14: Larceny – Larceny walkthrough
- Mission 15: 1AU – 1AU walkthrough
- Mission 16: Chosen – Chosen walkthrough
Tips, tricks and tactics for killing Modular Upsilon and Modular Sigma
This is quite a tough fight and it’s important that you’re constantly prioritising Modular Sigma whenever he appears – the mini-boss that’ll give Upsilon temporary invulnerability.
As soon as Modular Sigma appears, aim for his head or blast him with a power weapon until he goes down. Once he’s taken out, begin focusing on Modular Upsilon’s eye. Of course, whenever Modular Sigma reappears you’ll want to rinse and repeat this strategy.
Avoid going into melee range with Modular Sigma as he’ll be backed up by lots of tough Taken forces. Exercise caution and patience here, using cover and retreating when necessary. Don’t ignore them either though, as they are your main source of ammunition!
It’s easy to get overwhelmed by all the gunfire, so we recommend being patient and retreating around the circular arena to regain your health if things are going south.
Waves of enemies will continue to aid Upsilon, even when Sigma is down. We recommend taking down these waves as quickly as possible, before focusing on tearing into Upsilon’s eye.
Using your Super just after Sigma dies is also a great way of chunking Upsilon’s health bar quickly while he’s vulnerable. Grenades and power weapons are a great way of clearing mobs and inflicting huge amounts of quick damage to Upsilon and Sigma too.
Be patient, prioritise your own survival. Once he’s down, the mission concludes! Chech the links just a little further up the page for help with the rest of the missions in Destiny 2.
Video Walkthrough
Below we’ve embedded a complete video walkthrough of this mission to help you out even further. It’ll take you through every objective and showcase how to deal with Modular Upsilon and Modular Sigma too. If you’re struggling with this mission, it’s also a great resource to play alongside the mission itself so you can follow their steps.
Found the video helpful? Do make sure to give it a thumbs up and consider subscribing to their channel for more useful Destiny 2 content.
