
Everything we currently know about Hearthstone's new upcoming single-player mode.
Our Hearthstone Dungeon Run guide contains boss details, tips, strategy advice and details of the best Treasure and Passive upgrades available.
A new single-player mode for Hearthstone called Dungeon Run was added with the release of the Kobolds and Catacombs expansion. This new roguelike component for the game challenges you with tackling eight randomly selected boss encounters, one after another, from an overall pool of 48. It’s been a hugely popular addition to the game, and it’s the kind of content we hope to see reiterated upon in future expansion.
We’ve been tracking developments of Dungeon Run in this article ever since the mode was first announced at BlizzCon, and we now have tips and tricks for dealing with a massive number of the bosses. We’re continuing to add to that advice on an ongoing basis, so check back regularly for updates. We’ve also got some advice for choosing the best upgrades and building a deck for your hero of choice. Check the links in the navigation bar below to jump straight into what you need.
UPDATE: 3RD JANUARY 2018
We’ve added another dollop of guides to beating each boss in Dungeon Run, and will be working on polishing off the lot of them in the coming days.
Navigation:
Use the following links to quickly navigate to the section of the guide you’re most interested in right now!
1. Boss List – Tips, Tricks and Strategies
Boss List – Tips, Tricks and Strategies
Now that the expansion is fully under way we’ve got much more insight into who and what you’ll be facing as you head deeper into each dungeon. For now we’ve got a list of every boss you can encounter in Dungeon Run, and we’re in the process of adding tips for beating each one.
We’re going to start by breaking out the five possible end-bosses you can face though, as these are by far the ones you’re most likely to run into trouble fighting!
FINAL BOSS #1: AZARI, THE DEVOURER
Hero Power: Devour. O Mana. Remove the top 2 cards of your opponent’s deck.
You’re going to need a lot of luck on your side when you find yourself up against Azari the Devourer. For a start there’s that Hero Power which burns the top two cards of your deck each turn. This adds urgency to the encounter as you race to beat him before Fatigue sets in, while you also potentially lose your best tools to get the job done.
The best advice we can give here really is to dig for your best cards in your opening hand because you are very likely going to lose them across the course of the entire match. You do of course still need to keep yourself in the game, so don’t be too glib about throwing away your board control tools.
Ensure you do whatever it takes to preserve your minion presence on the board, however meagre it is. Hard removal spells, good trading – if it leaves you with something to play with on the next turn, do it. If you rolled a hero that can do regular damage via the Hero Power – Hunter’s great here – then work that damage in wherever you can.
Here’s a gameplay video featuring Azari so you what to expect!
FINAL BOSS #2: KING TOGWAGGLE
King Togwaggle is one of five end bosses you can meet in the Dungeon Run and he’s also your host for the entire run. He’ll give you advice and strategy tips about the bosses you’ll encounter, before you actually begin the fight with the boss in question.
Hero Power: Magic Candle. 3 Mana. Find a Treasure!
When this encounter begins King Togwaggle will have two Mana, which means he’ll actually have access to three Mana when his turn begins. This means he can use his Hero Power straight away, and start digging for the same Treasure cards that you’ve been acquiring throughout the run.
As you’ll have seen from our upgrades breakdown elsewhere in this guide, some of those Treasures are a good deal weaker than others, while some are practically game-breaking. No surprises then that your best bet is to get this over as quickly as possible before the boss can high-roll his way to victory.
FINAL BOSS #3: THE DARKNESS
Hero Power: Encroaching Darkness. 0 Mana. Summon a 5/5 Darkspawn
This is a tough, tough fight and The Darkness will make use of that Hero Power at the start of every turn. To help somewhat you have three copies of a card called Luminous Candle, which destroys all of the Darkspawns currently on the board. Of course, the limited supply means you have to time the usage of these powerful tools quite carefully.
All of the damage you receive during the fight will come from the minions out on the board, and so your best bet is to hold onto your Luminous Candle cards and take some of that Darkspawn damage. When you are able to field a solid board and play a Candle then do so, providing advantage in the match. Just be aware that the boss has many removal effects like Twisting Nether and Entomb.
The video quality isn’t great here but it should nevertheless give you a good idea of what to expect from your encounter with The Darkness:
FINAL BOSS #4: VUSTRASZ THE ANCIENT
Hero Power: Vindictive Breath. 0 Mana. Deal 1 damage to all enemies for each missing Master Chest
When the encounter with Vustrasz begins he’ll have five copies of Master Chest on his side of the board. The more of these Chests you destroy during the match, the more powerful Vindictive Breath grows.
Although those Chests have zero Attack power and might make you think the best thing to do is ignore them, Vustrasz buffs them over time. Thus, you have to juggle dishing out damage against the boss while also keeping one eye on the damage over time you’re taking.
Hopefully by the time a Chest has received several buffs, you’ll be in a later stage of the game where you have sturdier minions. At that point it’s better to kill the Chest, grab your Treasure and accept that your minions are going to take some damage every turn. It’s not ideal, but sooner or later you’re going to have to put the pressure on and hope you outlast the boss.
As for earlier-game minions, keep in m,ind that Vustrasz has access to more traditional board clearance effects such as Spirit Lash and Holy Nova, and can also boost the strength of these otherwise minor AOE spells.
Here’s gameplay footage of the encounter so you can get a heads-up before getting stuck into this final boss for yourself:
FINAL BOSS #5: XOL THE UNSCATHED
Hero Power: Beam Me Up (Passive). At the end of your turn, add a Beam to your hand.
Xol the Unscathed is a tough boss to beat, with a Hero Power which grants her one of six possible beams whenever her turn ends. The good news is that she actually tells you which spell is active, and we’ve got a breakdown of all the options she might have to play with:
- Beam of Confusion: Take control of a random enemy minion. [FLUMMOX]
- Beam of Death: Destroy all damaged enemy minions. [FATALITY]
- Beam of Decay: Destroy one of your opponent’s Mana Crystals. [FATIGUE]
- Beam of Fear: Shuffle a random enemy minion into your opponent’s deck. [FEAR]
- Beam of Fire: Deal 2 damage to all enemy minions. [FLAME]
- Beam of Frost: Freeze a random enemy minion and the minions next to it. [FROST]
The main strategy for beating her involves carefully managing the beam she currently has. Play around it at all times, and basically focus on giving her as little value from it as possible.
The fundamental nature of Xol is that of a Discard Warlock, and those are not hard to beat. Just play cagey with those beams and you should have no trouble beating her – fingers crossed she may even Discard one of the key parts of her own strategy along the way!
A.F. KAY
Hero Power: Idle. 2 Mana. Do nothing.
Turns out we were trolled all along. You might think A.F. Kay never takes a turn, but that’s only if you don’t kill her before Turn 6. At that point, she floods the board with a disgusting array of 8 / 8minions, before refilling her hand with Bag of Stuffing. Basically, kill A.F. Kay A.S.A.P, and Mulligan for minions that give you a fast start on the board.
BATTLECRIER JINZO
Hero Power: Battle Totem – Passive. All Battlecries trigger twice.
The good news about Battlecrier Jinzo is that you both get to benefit from that passive Hero Power. Assuming you’ve bagged a few Battlecry cards from you deck you can generate some incredible value out of this encounter. Just watch out for some of his signature cards like Ravaging Ghoul and Bomb Lobber – that stuff can hurt.
Because the boss has a decent amount of both healing and AOE, it’s important that you don’t over-commit on the board, and just gently snowball a game-ending threat. Always assume the worst, and that you’ll need to build another board presence at some point during the encounter.
BINK THE BURGLAR
Hero Power: Coin – 0 Mana. Gain 1 Mana Crystal this turn only.
Bink is one of those enemies you can face very early on in any given Dungeon Run and shouldn’t really give you any trouble, regardless of which hero you’ve chosen. Keep in mind, however, that he can gain The Coin every turn if he decides to, and it’s possible to get caught up by this character! Just push to end the match as quickly as possible, throw everything you have at him, and let Bink worry about the trades.
BLACKSEED
Hero Power: Unknown – 0 Mana. Transform a minion into a random one that costs 1 more.
Hero Power: Unknown – 0 Mana. Transform a minion into a random one that costs 3 more.
BRIMSTONE WARDEN
Hero Power: Dispel Ward – 5 Mana Silence your minions.
If that Hero Power looks a bit rubbish, you clearly haven’t paid attention to the board. Brimstone Warden begins each match with a total of 4 x 15 / 5 Stone Golems which can’t Attack – yet. Your objective is very simple: kill the boss before he can awaken those Golems using that expensive Hero Power.
It is possible to beat this boss using a more control-orientated approach, but keep in mind you’re also going to have to handle Poisonous creatures such as Pit Snake and Emperor Cobra along the way. Really though, the face is the place in this tricky encounter.
BRISTLESNARL
Hero Power: Hunter’s Call – 3 Mana. Reduce the cost of cards in your hand by 1.
CANDLEBEARD
Hero Power: Charge! 1 Mana. Give a minion Charge.
Hero Power: Charrrrrge!! Passive. After you play a minion, give it Charge.
If Candlebeard shows up earlier on in your run you’ll get that weaker Hero Power to deal with, but after Level 6 or so you’ll have to contend with an endless volley of charging minions. While the first version of the Hero Power costs 1 Mana, note that the improved version is passive and so applied automatically.
Board control is the name of the game as a result. You can expect Candlebeard to field minions with high Attack but low Health, so it should be relatively easy to pick them off before they can cause too much commotion. Note, however, that he makes use of cards like Ship’s Cannon as well – you really want to take this sort of threat down as quickly as you can.
CHRONOMANCER INARA
Hero Power: Stolen Time. 10 Mana. Destroy 3 of your Mana Crystals. Take an extra turn.
Inara’s Hero Power is interesting but not the biggest threat you need to worry about in this encounter. More problematic is her Astral Portal card, which will occasionally grant her a disgustingly powerful Legendary card.
If you can control the game and hit Turn 10 with the board in her charge, you should find it very easy to get over the finishing line.
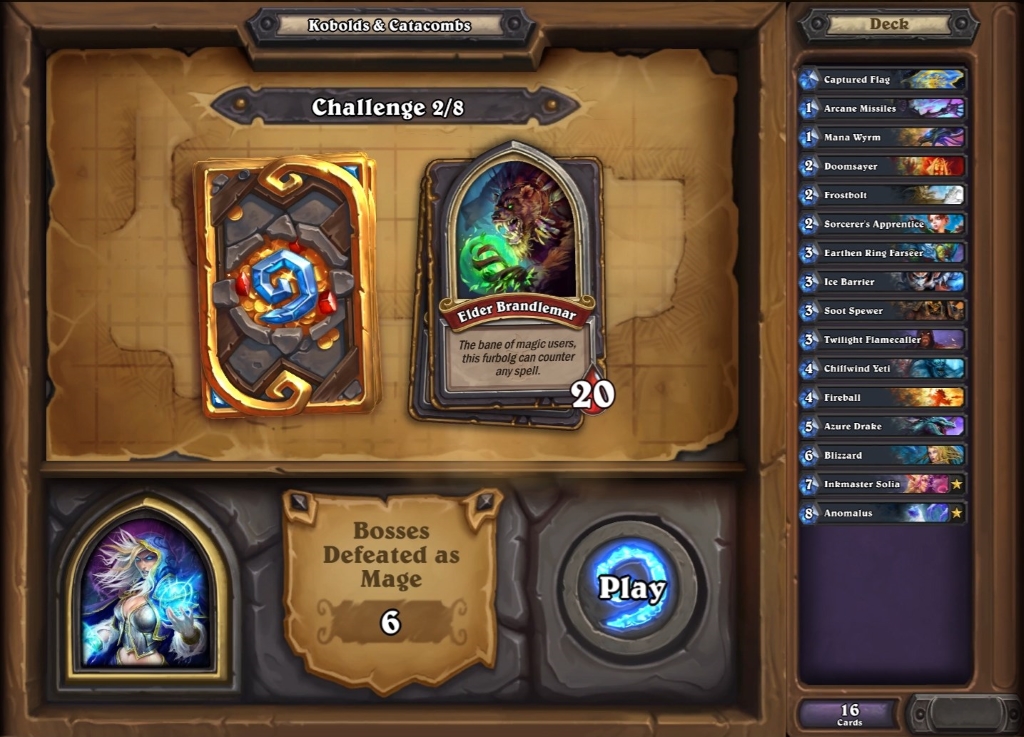
ELDER BRANDLEMAR
Hero Power: Dampen Magic – 2 Mana. Put a Counterspell Secret into the battlefield.
When Brandlemar gains two Mana he will make use of that Hero Power. That means if you can’t cast the spell in question on the turn before, you should not keep it during the Mulligan stage. If you have The Coin you can use it to bait out the Counterspell, otherwise be ready to play a spell you care less about, before casting the vital one!
ELDER JARI
Hero Power: Mystic Barrier – 1 Mana. Gain 3 Armor
Elder Jari doesn’t show up until later on in a run, and by this time you should have amassed more than enough firepower to overcome that Armor-granting Hero Power. Just be aware that this protection does add up over time, and Jari will begin fielding Taunt minions onto the board in the late-game. Keep the pressure on and just finish this fight as quickly as you can.
FROSTFUR
Hero Power: Freeze – 2 Mana. Freeze a minion
Frostfur assumes the form of a very aggressive Mage, and so it’s important you don’t get complacent with your Health during the encounter. A couple of Fireballs to the face can quickly knock you out of the Dungeon Run if you’re not careful.
As annoying as that Hero Power is, if you’re building a bigger and bigger board you should still be able to race this boss to the finishing line – and don’t forget that the Hero Power comes with a very wasteful price tag.
FUNGALMANCER FLURGL
Hero Power: Unknown. 2 Mana. Give your minions +1 / +1
GEORGE AND KARL
Hero Power: Divinity. 2 Mana. Give all your minions Divine Shield
This is the Token Paladin format that you’re surely familiar with by now, and you should expect a flood of Silver Hand Recruits that become more powerful over time.
The fight is also split into two very different parts. First you fight George with 30 Health and this Hero Power. When he’s dead you’ll take on Karl who again has 30 Health but also a different Hero Power which summons a pair of 1 / 1 Recruits each time.
As you’d imagine, the most important thing to do is keep that board clear as much as possible. What they don’t have out on the board can’t be buffed up, after all, and you definitely don’t want to have to deal with a board that’s full of Divine Shield minions. Even 1 / 1 damage can stack up quickly over time…
GIANT RAT
Hero Power: Rat Race – 2 Mana. Summon two 1 / 1 Rats.
Giant Rat is one of the bosses that you are most likely to encounter very early on in your attempt. He’s a bit of a softie all things considered, but be prepared for a Dire World Alpha drop, and a buff / Divine Shield spell that can actually take out one of your bigger minions.
GNOSH THE GREATWORM
Hero Power: Swallow Whole. 2 Mana. Destroy the minion with the highest Attack.
Understanding how that Hero Power works is key to beating Gnosh with ease. Always make sure that he has the strongest minion at any given time, so that he wastes Mana destroying his own board presence.
If you keep that in mind, and only field small bodies onto the board, you should have no trouble whittling this character down in a slow but steady fashion.
GRAVES THE CLERIC
Hero Power: Light’s Will – 0 Mana. Restore 2 Health to all minions.
Graves is effectively the Control Priest archetype and he has a lot of AOE to play around with so don’t over-extend onto the board. Partial trading is also a bad idea here, as he has a cheap and fast way of healing his minions back up to high health. Expect to see the old favourite combo of Injured Blademaster and Northshire Cleric here.
Your best bet is to focus on gaining the early-game board in any way whatsoever, then finishing Graves fast. Let him do any trading that happens on the board once you’re in charge. If you have a way of ping-damaging your own minion, Graves will tend to avoid casting his free healing Hero Power too. Something to think about.
GUTMOOK
Hero Power: Unknown. Passive. Whenever your opponent casts a spell, summon a Tunnel Trogg.
Hero Power: Unknown. Passive. Whenever your opponent casts a spell, draw a card. It costs 1.
This is another boss who’ll have you groaning if you’ve gone down the heavy spell-damage route when building your deck. Encounter him early on in your run and he’ll gain a Tunnel Trogg every time you casts a spell. Find him later in the adventure and he’ll draw a card when you cast a spell, and the cost of that card is reduced to one Mana. He’ll then add loads of Troggs to the board and start casting his own spells.
Your best bet here is to hold back spells until you’re very close to the finishing line, and in the meantime simply use any weapons, minions and Hero Power damage you have access to to force down his Health.
IXLID
Hero Power: Sprouting Spore. 2 Mana. Summon an extremely Deadly Spore.
Ixlid represents the Aggro Token Druid format and can buff his minor minions up remarkably well. Once that Hero Power starts being pumped out from Turn 2 onwards, it’s vital that you destroy the Spore before it can kill you dead.
You need cheap removal and cheap minions from the very start of the match, so that you always have something to pick off the 1 / 1 Spore with. All it needs is a single touch on your hero to finish the Dungeon Run, after all.
JEERU
Hero Power: Unknown. 1 Mana. Each player draws 3 cards.
KRAXX
Hero Power: Giant Stomp. 2 Mana. Deal 1 damage to all enemy minions.
Kraxx doesn’t play many minions of his own but that Hero Power can of course present a serious problem to you over time. Keep a few minions trickling onto the board, but be mindful of his AOE damage and avoid over-committing. This is another encounter where you need to finish as quickly as possible, without going so fast that you run out of resources.
LAVA-FILLED CHAMBER
Hero Power: The Floor is Lava – Passive. After a minion is played, deal 2 damage to it.
LYRIS THE WILD MAGE
Hero Power: Arcane Infusion – 1 Mana. Add Arcane Missiles to your hand.
The biggest problem with fighting Lyris is the ridiculous number of Flamewakers which she starts summoning pretty much from three Mana onwards. In fact we believe she has an endless supply of these minions to play with (and apparently a Archmage Antonidas too – top trolling).
It’s really important that you gain board presence fast against this boss, as she won’t be able to do much before Turn 3. From there you’ll have to control the board and hope to field minions with decent Health tallies. The idea is to get to a point where you have enough strength on the board to deal with new Flamewakers and start chipping the boss’s Health down.
OVERSEER MOGARK
Hero Power: Unknown. 1 Mana. Deal 1 damage to a friendly minion and give it +2 Attack.
Hero Power: Unknown. 1 Mana. Deal 1 damage to a friendly minion and give it +5 Attack.
You can face two versions of Overseer Mogark. Find him early on in the Dungeon Run and his Hero Power will dish out one damage to a minion but increase its Attack by two points. Later on, however, the buff increase to five points – serious business.
Note that he includes lots of zero Attack minions that have a beneficial – to Mogark – Deathrattle. Be ready for cards like Devilsaur Egg and Frothing Berserker here.
THE MOTHERGLOOP
Official description: Don’t let its growing, gooey friends get out of hand.
MUSHHUCKSTER MAX
Hero Power: Mushroom, Mushroom – 2 Mana. Craft a custom Mushroom Potion
An interesting note about Mushhuckster Max that we learned from the recent livestream with Ben Brode and Day9. All of Mushhuckster’s potions are drawn from 1-Mana brews created by Kazakus.
PATHMAKER HAMM
Hero Power: Unstable Explosion – 1 Mana. Deal 1 damage to two random enemies.
Hero Power: Unstable Explosion – 2 Mana. Deal 2 damage to three random enemies.
This guy is seriously, seriously annoying and if you encounter him with the wrong kind of deck you’re pretty screwed. Encounter him early on and his Hero Power will dish out one point of damage to two random enemies. Later on the cost of this Hero Power doubles but he does two damage to three enemies to compensate for the higher cost.
The interesting thing about Hamm is that his Hero Power is effectively passive and so it will go off each and every turn. If you’ve no minions on the board then your face will take one hit but no more than that. The exception to this comes from the many, many Mad Bombers this guys packs in. They’ll happily pummel your face all day long.
RUSSELL THE BARD
Hero Power: Alluring Tune – 2 Mana. Gain Control of an enemy minion with 2 or less Attack.
Russell the Bard’s Potion of Madness-like Hero Power can really wreck your early-game and it goes without saying there’s no point giving him anything for free. The trick here is to try and remove his own large threats while being mindful of the Lesser Onyx Spellstone he packs.
Watch out for Antique Healbot as well as you approach the finishing line. Like all of these bosses, Russel The Bard always seems to have the one thing you don’t want to run into right now – and that minion brings him right back into the game.
SERIONA
Hero Power: Fading Light – 2 Mana. Give a minion -1 Attack.
Seriona is a Dragon Priest and you should expect to see all the most annoying cards that this entails: Book Wyrm, Duskbreaker and so on. You need to keep fielding minions onto the board to nullify Seriona’s Hero Power, but be mindful of AOE board clears and try to keep a little something back rather than going all-in.
Something else to consider here is the risk of fielding low Attack mininos. She can keep pushing that Attack value down, and eventually leave you with a useless minion that only clogs up your board for you – not good. You should also be mindful of the healing spells Seriona has, and save your fast burst damage for getting over the finishing line.
SPIRITSEEKER AZUN
Hero Power: Totem of the Dead – Passive Your Deathrattles trigger twice.
This is the Dungeon Run’s Quest Priest, and so Azun is keen as mustard to see his Deathrattles go off multiple times. Watch out for cards like Tortollan Shellraiser, Shifting Shade and Anubisath Sentinel. The simple advice? Finish this one as quickly as you can because he’s only going to present you with more problems, the longer the match in question goes on.
TAD
Hero Power: Catch and Release – 0 Mana. Summon a random minion from your deck.
Tad has ten cards in his hand at the start of the match and uses his Hero power in order to bring a randomly selected creature into play. Specifically, he’ll gain a minion equal to the Turn number in question. Here’s his deck composition:
- Emerald Hive Queen
- Millhouse Manastorm
- Starving Crab
- Flamewreathed Faceless
- Earth Elemental
- Cairne Bloodhoof
- Swamp King Dred
- Ragnaros the Firelord
- King Krush
- Tyrantus
There’s a bonus objective here. If Tad reaches Turn 11 without taking damage (meaning you’ll have to kill Starting Crab straight away when it shows up), Tad will summon a Sunken Chest. This contains a bonus Treasure card called Tad’s Pole!
THADOCK THE THIEF
Hero Power: Unknown – 1 Mana. Return a friendly minion to your hand.
This is Quest Rogue! You know what to do here. Race them to the finishing line and don’t leave anything up on their side of the board as they approach the Quest triggering phase of the fight. It’ll be very hard to bounce back and win the match otherwise, especially if you get Thaddock relatively early on.
TRAPPED ROOM
Hero Power: Alarm. Passive Hero Power. Whenever you reveal a Secret, summon a 3 / 3 Sawblade.
Urgh. The developer weren’t kidding at BlizzCon when they said this was one of the toughest encounters in Dungeon Run. It’s so tricky, in fact, that it’s specifically tuned to show up less often than some of the others.
To compensate somewhat for the increased challenge, Trapped Room starts off with just 40 Health which is some way lower than that of the other bosses you’ll face around this level. Not only does the boss have access to Secrets from across the entire multi-class collection, it can also make use of powerful cards like Secretkeeper and Ethereal Arcanist.
You need a lot of luck to survive this encounter, although a solid knowledge of how to probe for Secrets has obvious advantages here. The good news is that another of the boss’s minions – Shroomsayer – provides neat AOE damage to all minions, assuming you can find a way of doing partial damage to it.
Good luck, basically. This is one of the stinkers Blizzard has thrown in to give Dungeon Run its true roguelike flavour! Sometimes you’re just going to find yourself running into this brick wall, but it is possible to beat it.
TREASURE ROOM
Hero Power: 5 Mana. End the game.
VOODOOMAKER HEX
Hero Power: Unknown – Passive. Your Battlecries and Deathrattles trigger twice.
This character’s Hero Power causes all Deathrattles and Battlecries to go off twice! This character originally had an optimised deck that made the fight far too tough so they redesigned it for maximum chaos. Expect anarchy thanks to cards like Abomination.
WAXMANCER STERMY
Hero Power: Sculpt Wax – 1 Mana. Summon a 1 / 1 copy of a minion.
Hero Power: Harden Sculpture – 3 Mana. Summon a copy of a minion.
This is another boss that can show up at different stages of your run, and have a slightly different Hero Power depending on when you run into him. Early on he can summon a 1 / 1 copy of one of his minions or yours. Later on the cost of casting this Hero Power increases to three but allows him to summon an identical version of any minion.
The danger with this latter version is you summon your absolutely amazing, super-win minion and Sturmi makes a version of it for himself. Do not play into this devious game, at least until you’ve got the boss near death and can afford to take a calculated risk by playing a few of your larger minions. You won’t win a pure value game against this boss though, so don’t try to!
WEE WHELP
Hero Power: Baby Breath – 2 Mana. Deal 2 damage.
Like Giant Rat this is an incredibly simple encounter to deal with and you’ll only encounter this creature in the early stages of any given run. Just be aware that at some point it is possible for this boss to gain access to Dragon’s Breath!
WHOMPWHISKER
Hero Power: Join the Fray – 2 Mana. Both players Recruit a minion.
This expansion is all about Big archetypes, and Whompwhisker is the Dungeon Run character who best epitomises that approach. Two things to consider here.
First, although the boss does have quite a lot of big minions, he also has some rather mediocre ones to draw into as well – it’s by no means a lost cause. Secondly, when he casts his Hero Power you get the first chance to gain initiative with your summoned minion, so punish him by wasting his Mana usage and making a favourable trade on the board.
Best Dungeon Run Passive Upgrades – Tier List
General Ranking
The following Passive upgrades all provide a general advantage to whatever deck you happen to be building, and so can be ranked against one another reasonably well. There is of course a lot of variance to be taken into account based on the deck you happen to be building in any given run!
9. Cloak of Invisibility. Why are we putting this in bottom slot? Although it seems fantastically powerful to be able to give your minions permanent stealth, it means the enemy can only target one thing with its minions, spells and hero power damage – you.
8. Potion of Vitality. This doubles your hero’s starting health, but health is of course just another resource to sacrifice to win the board and the game. Might be good to pad out later on, but ultimately you want something with a more immediate impact on the tempo of the game.
7. Small Backpacks. Card draw is useful, but it does not directly impact the board or the tempo of the game. Might not pay off big enough if you already have cards to play on curve. Provides flexibility and more draw if you’re running very aggressively, but aggro decks are unlikely to get you all the way to the end of the Dungeon Run.
6. Mysterious Tome. Provides solid tempo and puts more effects into play quickly. Unfortunately, random Secrets aren’t necessarily good, especially Paladin early game Secrets. Mage Secrets are better, and Hunter’s aren’t bad, but with no influence over the timing of each Secret being cast it’s not as good as it looks at first glance.
5. Glyph of Warding. A big tempo advantage for you as it makes all of your opponent’s minions cost one Mana more. The downside here is that the bosses gain much of their strength from their hero power which is unaffected by this card. They also have big spells and minions to play around with.
4. Crystal Gem. This is going to be very useful regardless of the kind of deck you’re building, although it goes without saying that decks looking to ramp into a bigger late-game do particularly well out of this Passive. Still, being even one Mana Crystal ahead in the early-game can provide a huge swing with the right starting hand. Make sure you factor this extra resource into your Mulligan though.
3. Khadgar’s Scrying Orb. This puts the power squarely in your camp, allowing you to build a big spell deck as you make your way through the dungeon. Minions costing less would be a lot more valuable, but this is nevertheless a very powerful card that you can use to inform your deck-building approach.
2. Justicar’s Ring. This upgrades your hero power in the same way as Justicar Trueheart did back in the day. By reducing your hero power cost as well, you end up with a hugely consistent advantage across all boss fights you’re going to run into during the Dungeon Run.
1. Captured Flag. Providing all your minions with +1 / +1 is like a Prince Keleseth that always delivers, and if you’ve been playing much Hearthstone over the last couple of months then you’ll know how insanely powerful that prospect is. Not only does this provide a buff to the deck you’ve already built (usually), you can use this card to inform your future picks as well.
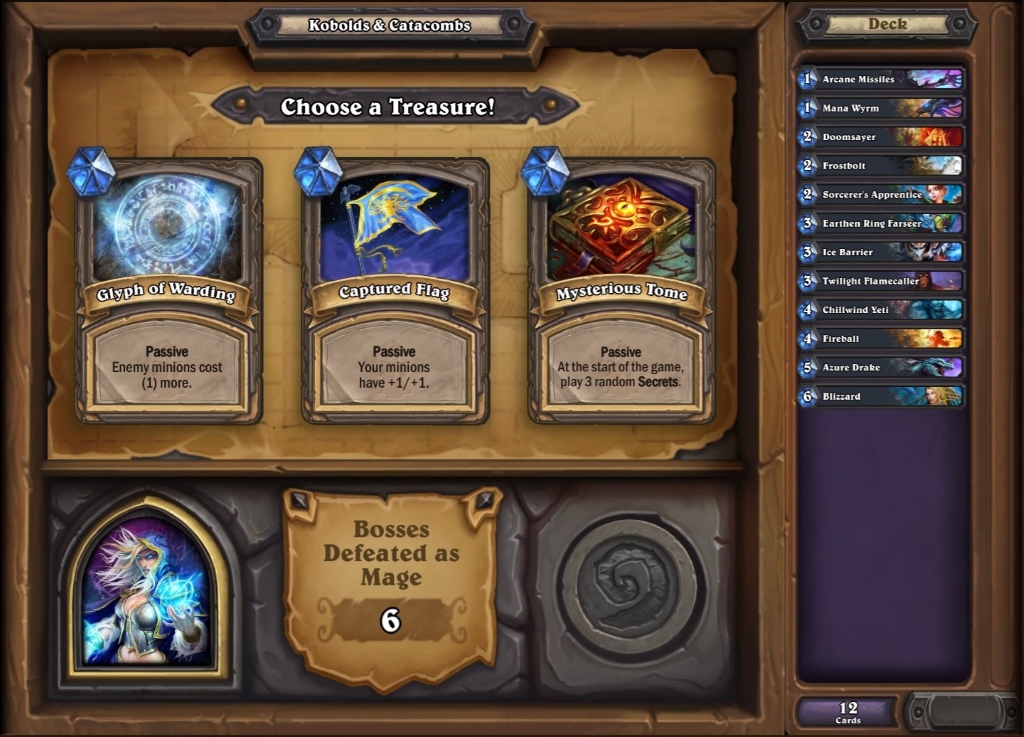
You’ll have the chance to unlock two passive upgrades across the entirety of each run. These might boost up your minions, weaken the opponent’s, or provide some other benefit.
Conditional Passives
The following Passive upgrades are all extremely potent in the right deck, but are so conditional on being in that correct deck that they resist overall ranking. Be mindful of the direction your deck is starting to take as the following could give you an advantage way beyond that provided by our general ranking list.
- Battle Totem. Your Battlecries trigger twice.
- Grommash’s Armguards. Your weapons cost 1.
- Robe of the Magi. Spell Damage + 3
- Scepter of Summoning. Your minions that cost 5 or more cost 5.
- Totem of the Dead. Your Deathrattles trigger twice.
Best Dungeon Run Treasures – Tier List
We originally featured a hard ranking of the Dungeon Run Treasures in this section but around 20 more were revealed after launch and it’s proving tricky to provide an overall hard ranking.
We’re in the process of adding our thoughts on each one, however, so you can use the following information to guide your choice between the three that are presented to you.
Bag of Coins. At the end of the day, adding lots of Coins is great but at the start of the game it only means you can play a big card or two, and in doing so likely empty your hand and lose card advantage. There are better ways, using other Treasures, to bring extra minions into play. It’s powerful, but not nearly as powerful as the other options.
Boots of Haste. Much like the Bag of Coins it provides tempo advantage, but you need to have a solid hand to gain value from it. Note also that if the opponent can clear the board after you’ve just emptied your hand, you are losing a huge amount of card advantage. Very risky until we know more about all of the bosses contained in Dungeon Run.
Gloves of Mugging. Note the use of the word Steal here – you not only get the opponent’s cards, you deny them the use of those cards at the same time! It’s a huge power swing, and remember that AI bosses often have disgustingly overpowered minions. The card advantage alone makes this incredibly useful, and could combo well with Boots of Haste.
Horn of Cenarius. This will allow you to develop lots of minions on the board without starving your hand of resources. Even though it costs a bit more than Boots of Haste, it represents more value over the long run, and is less risky when it comes to exposing yourself to enemy board clears.
Rod of Roasting. A very expensive card with an effect which might just as easily destroy your own hero. Late into a Dungeon Run if you lose, you’re losing the whole run – it’s just too risky. Yes you can double your health with the Potion of Vitality, but for the most part this is a case of too much risk, not enough reward (on average).
Vorpal Dagger. The ability to remove up to four minions in any given turn with your weapon, and sacrificing only your Health to do so, is incredible but not as good as some of the other Treasures. Consider also that you may have to hit some extremely beefy minions and leave your hero very exposed to lethal damage. Again, it’s not that this is bad, just that there are even better options!
Wand of Disintegration. A fantastic card that clears out the enemy’s board presence, silencing any Deathrattle effects first and guaranteeing board advantage. When you consider the roguelike nature of Dungeon Run (where one mistake can end your attempt), having this kind of tool in your backpocket will likely be a huge deal.
Wax Rager. The Deathrattle on this minion is the secret sauce because every time you sacrifice it, you get it returned to the board for use all over again. Only Silence effects are going to stop this creature from doing its thing, and so it represents insane amounts of value over the course of a game.
Wish. The text for this card speaks for itself, and there is simply nothing else in this list that provides more value. It’s like Reno Jackson on steroids, bringing you back from the brink of disaster and filling your board with Legendaries. Yes you might get some duffs in the mix, but odds are you’re going to get at least half a board of awesome stuff!
Here are the remaining Treasures that have been revealed since launch. We’ll have insight into each one in a future update to our Dungeon Run guide. In the meantime, do share your thoughts on the power of each one in the comments – we’d love to hear how you’ve been getting on with them!
- Aleatoric Cube – 2 Mana. Shuffle both decks together and give half to each player. Your cards cost 2 less.
- Amulet of Domination – 2 Mana. Take control of an enemy minion. Add it to your Dungeon Deck.
- Bag of Stuffing – 1 Mana. Draw cards until your hand is full.
- Blade of Quel’Delar – 1 Mana. 3 Attack. 3 Durability.
- Dr. Boom’s Boombox – 4 Mana. Summon 7 Boom Bots.
- Embers of Ragnaros – 3 Mana. Shoot three Fireballs at random enemies that deal 8 damage each.
- Golden Kobold – 3 Mana – 6 Attack – 6 Health. Taunt. Battlecry: Replace your hand with Legendary minions.
- Greedy Pickaxe – 2 Mana – 3 Attack – 2 Durability. After your hero attacks, gain an empty Mana Crystal.
- Hilt of Quel’Delar – 1 Mana – Give a minion +3 / +3.
- Orb of Destruction – 3 Mana – Destroy 2 of your opponent’s Mana Crystals and they discard 2 cards.
- Portable Forge – 1 Mana – Discover a random Legendary weapon and equip it.
- Portable Ice Wall – 1 Mana – 3 Attack – 15 Health. Taunt. Can’t Attack. Freeze any character damaged by this minion.
- Primordial Wand – 4 Mana – Adapt a friendly minion. Repeat for each Boss you’ve defeated this run.
- Quel’Delar – 1 Mana. 6 Attack – 6 Durability. After your hero attacks, deal 6 damage to all enemies. [Gained by combining Hilt of Quel’Delar with Blade of Quel-Delar.]
- Shifting Hourglass – 7 Mana. Take an extra turn. Costs 1 less for each Boss you’ve defeated this run.
- Scroll of Confusion – 0 Mana. Each minion randomly chooses a side of the battlefield.
- THE CANDLE – 1 Mana. Deal 4 damage to all enemy minions. Shuffle this into your deck.
- Wondrous Wand – 3 Mana. Draw 3 cards. They cost 0.
Best Hero Choice and Deck Building
In this section of our Dungeon Run guide we’re going to start adding information about the best hero to select, and how you should then go about building your deck around each one’s strengths and weaknesses.
If you’ve played much Dungeon Run, you’ll have noticed you get what are called “buckets” of cards you can add to your deck. Our next update will contain advice for combining card buckets, but for now here’s a list of all the ones we know about (the title should give you a pretty big hint about what’s contained in them!):
| Druid | Hunter | Mage |
|---|---|---|
| Balance | Beast Training | Arcane |
| Cult of C’Thun | Big Beasts | Big Spells |
| Jade Fangs | Deathrattle | Chaos |
| Jungle King | Defense | Defense |
| Jungle Quest | Legendary | Elementals |
| Mana Growth | Secrets | Fire |
| Natural Defense | Shots | Frost |
| Restoration | Smugglers | Giant Army |
| Stampede | Summoner | Heroic Power |
| Stomp | Tracker | Legendary |
| Taunt | Weapons | Lost Secrets |
| Wise Decisions | Wee Beasts | Magical Friends |
| — | — | Unique |
| Paladin | Priest | Rogue |
|---|---|---|
| Divine Shield | Bag of Tricks | Adrenaline Rush |
| Dragon Master | Combo Caster | Assassin |
| Healing | Cult of C’Thun | Cult of C’Thun |
| Helping Hand | Discipline | Death Dealer |
| Justice | Domination | Evasive |
| Legendary | Dragon Priest | Exhaustion |
| Many Blessing | Elementals | Greed |
| Murlocs | Holy | Jade Lotus |
| Sacred Arms | Last Rites | Outlaws |
| Secrets | Resurrection | Thief |
| Silver Hand | Shadow | — |
| Taunt | Unique | — |
| Shaman | Warlock | Warrior |
|---|---|---|
| Destruction | Blood | Armor |
| Elementals | Cult of C’Thun | Berserker |
| Farseer | Destruction | Charge! |
| Frost | Dire Demons | Dragon Heart |
| Jade Lotus | Discard | Everybody Hurts |
| Mechanized | Huge Hand | Legendary |
| Murlocs | Lifesteal | Pirates |
| Mutations | Little Legion | Re-Enforcer |
| Overload | Sacrifice | Recruiter |
| Restoration | Swarm | Smash! |
| Totems | Taunt | Taunt |
| — | Unique | Weapons |
Dungeon Run rewards
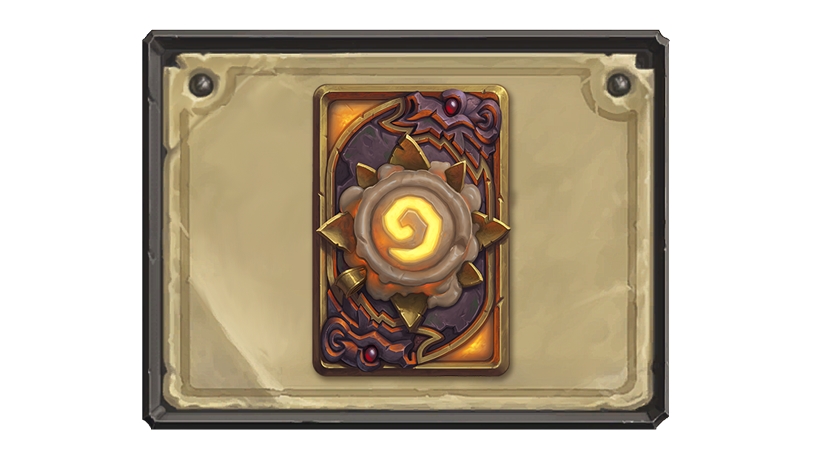
If you manage to beat Dungeon Run with all nine heroes, you’ll unlock the special Candle King card back. Here’s what it looks like!
Having originally claimed that Dungeon Run would not provide any rewards beyond the exclusive card back for the first completion, there will be Unique and Daily Quests associated with the mode!
The Unique Quests are built around your first few attempts at Dungeon Run and will appear sequentially as you work your way through them. Here’s how they break down:
- 1. Begin a Dungeon Run. Reward: One Kobold and Catacombs Card Pack.
- 2. Defeat 5 Dungeon Run Bosses. Reward: One Kobold and Catacombs Card Pack.
- 3. Defeat 10 Dungeon Run Bosses. Reward: One Kobold and Catacombs Card Pack.
In addition, a new Daily Quest is being added to the general rotation. It’s called Spelunker, and whenever it shows up you’ll receive one Classic card pack for beating a total of five Dungeon Run bosses. It’s a very cool way of helping new players catch up in particular and a welcome move from the team.
Dungeon Run General FAQ
Here’s the basic overview of everything we currently know about Dungeon Run.
- The mode will be completely free to play and you won’t need a single card in your collection to enjoy it.
- Blizzard has described the new mode as a rogue-like component for the game.
- It’s been described as the most replayable content ever released for Hearthstone.
- At the start of the run you’ll only have 15 Health and just 10 cards in your deck.
- You’ll earn new cards for your deck as you attempt to beat eight bosses drawn from an overall pool of 48!
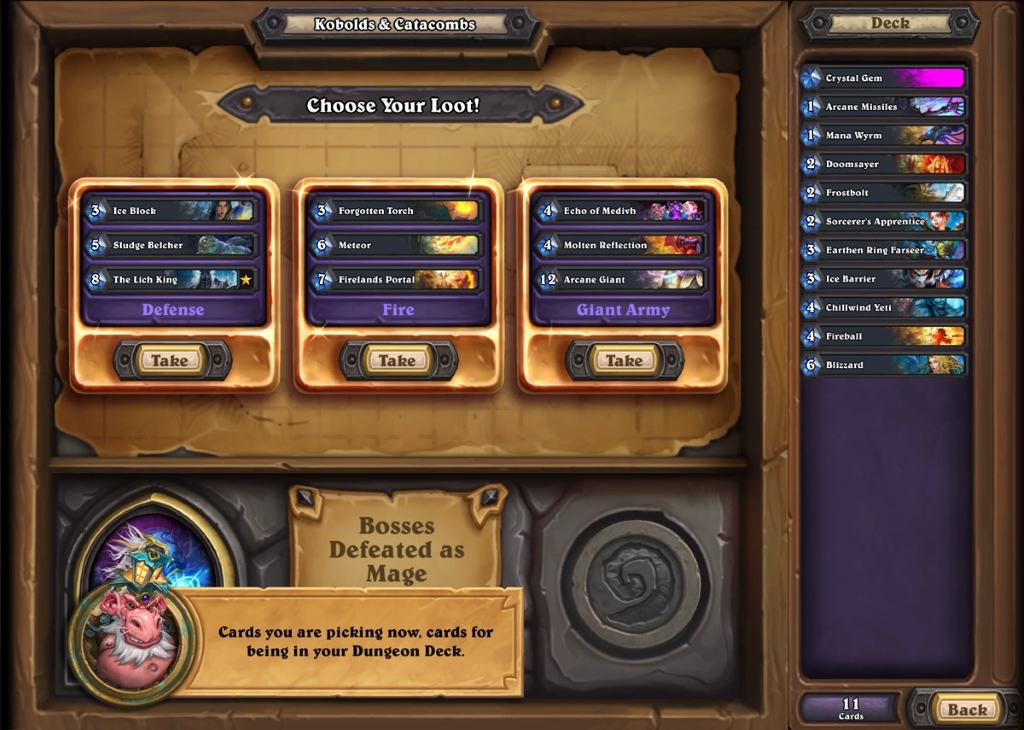
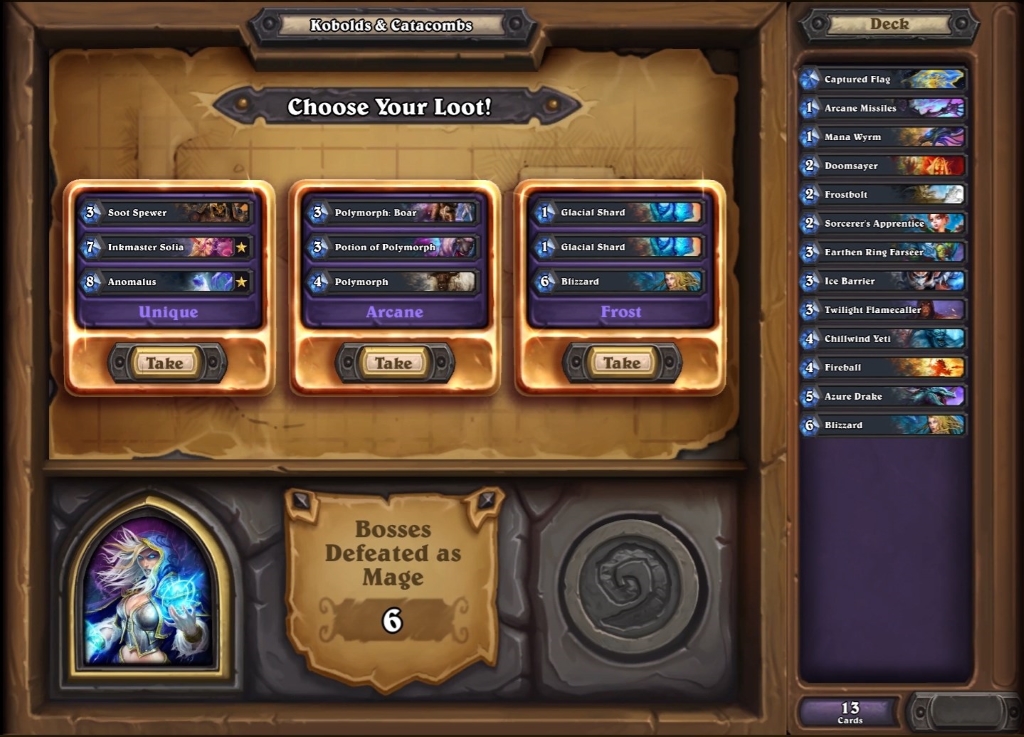
- When you beat a boss, you’ll be presented with three card bundle options containing three cards each. The cards within each group will have a certain synergy with one another. The card pack you choose is then added to your existing deck list.
- The eight bosses are randomly chosen at the start of any given run. If you get beaten before you’ve eliminated all eight, you’ll lose all of the cards you’ve accumulated and get kicked back to the start!
- If you do manage to beat Dungeon Run with all nine classes, you’ll receive a special Candle King card back.
What is a roguelike?
In case you’re unfamiliar with the term, a roguelike is an RPG containing a huge amount of random variation. Every time you play through, you can expect things to be very different based on the enemies you encounter and the loot (ie cards and bonuses – see below) that you accumulate along the way. Permanent death is a core feature of the game type, which means when you die you start all over again!
How will the difficulty change as you beat bosses?
In terms of difficulty, note that the bosses you face as you head deeper into the dungeon will bcome more difficulty. It’s not yet clear whether certain bosses are easier to defeat than others by design, or whether the stats get tweaked the deeper you go. We’ll update this section of our guide with more detail just as soon as we have it.
To ensure that you maintain some kind of edge in these encounters, Blizzard is introducing a number of extra boosts that you’ll be able to unlock during each run. Some of these are passive – and so provide an automatic background advantage – while others will have to be used strategically, as and when the best moment to do so presents itself.
What decks do you receive at the start?
A little bit more information about the nature of starting a Dungeon Run has emerged since Blizzcon.
Most importantly of all, we’ve learned that each class will have its own set of ten starting cards as the foundations of the deck. You shouldn’t expect this to be a particularly powerful collection of cards, but it will contain a mixture of cards suitable for the class in question. We know that the Priest will have Mind Blast, for example, while the Mage has Fireball.
Although you’ll start off with these initial cards, it’s important to note that the actual run itself will be different on each attempt. For this reason, you’ll need to carefully craft your deck around the card options you’re presented with after beating each boss.
Achieving a balanced deck sounds like it will be quite difficult, so you’ll instead be looking to shore up your weaknesses and build a somewhat synergistic deck by the sounds of things. In this sense, and although we don’t believe you’ll know the name and nature of upcoming bosses, it’s a bit like trying to craft a solid Arena deck.,
That’s all the extra insight we have on the start of each run for now, but we’ll continue updating our Dungeon Run guide between now and the run-up to launch. Stay tuned for more details on what to expect once you’ve stepped inside Hearthstone’s new PVE content!
Trivia
The original design of the Cloak of Invisibiltiy upgrade was that Stealth would behave as normal, and be broken once the minion in question had attacked.
The implementation was buggy, however, and the minions gained Stealth permanently and even after attacking! The team decided to keep it, but consider that if this sounds overpowered all the boss can do is throw everything they’ve got at your hero instead.
Because of this unexpected downside, you’ll need to build your deck around the Cloak of Invisibility and provide your opponent with more protection. It’ll definitely change the way you play the rest of your run and we’re promised it’s like playing a completely different kind of Hearthstone.
Dungeon Run Gameplay Video
Here’s a video of Disguised Toast playing the new content straight from the BlizzCon showfloor. Note that there’s no commentary here, and it’s naturally full of spoilers so if you’re hoping to go in blind, best to look away.
We’ve also uncovered a little gameplay footage from the Hearthstone Inn-vitational that was held at BlizzCon a couple of weekends ago. Here’s the Grimestreet Grifters setting foot inside their very first Dungeon Run:
Finally, here are some screenshots of the Dungeon Run UI that were released by Blizzard over the BlizzCon weekend.
That’s everything we’ve got for now! Expect many updates to this guide in the weeks between now and the launch of Kobolds and Catacombs at the start of December.
