
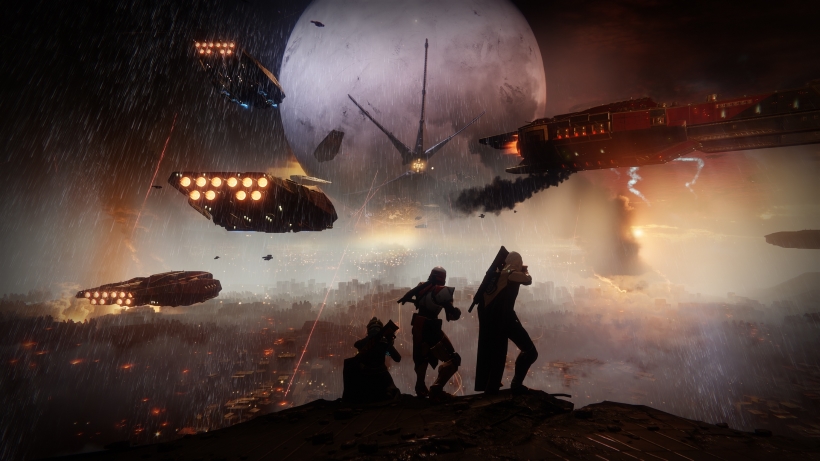
Destiny 2: Nightfall Pyramidion Strike guide – tips, tactics and strategies
Our updated walkthrough for beating Destiny 2's Pyramidion Strike on Nightfall difficulty.
Our Nightfall Pyramidion Strike guide for Destiny 2 contains tips, tricks and tactics for Genesis Mind, and advice for completing all objectives too.
The Pyramidion is a Vex-infested Destiny 2 Strike that throws no end of enemies at you and requires some tight teamwork if you’re to survive the whole encounter in one piece. It’s recommended that you have 140 Power before venturing in here on regular difficulty, while the Nightfall version requires you to have at least 230 – and you’d like a little more than that, to be honest.
Don’t forget to check out the rest of our Strike guides too – the links can be found further in the article! We’ve also just updated this guide to reflect the latest Nightfall changes too – you’ll find a complete walkthrough for this meaty challenge right at the top of the guide.
(If you want to be the best at every area of the game, don’t forget to bookmark our PVP, Campaign walkthrough and Subclass guide pages – they’ve got everything you need if you want to get more out of Destiny 2, and will be continuously updated in the weeks ahead.)
Editor’s UPDATE #5: We’ve updated this guide with a full walkthrough of the Nightfall version which we highly recommend you get stuck into – it’s great fun. You’ll find information on all the modifiers and a complete walkthroughs for both the Nightfall and the normal modes just below.
Nightfall Strike: The Pyramidion – Tuesday 16th January 2018
This week’s reset brings us a Nightfall version of The Pyramidion, and we’re pretty chuffed to be honest as this is one of our favourite Strikes in the game. With that said, it’s going to be far from a smooth descent into the Vex lake!
If you’re unfamiliar with the concept of a Nightfall Strike, it’s essentially a much tougher version of the original group encounter. It’s made harder thanks to three modifiers that drastically alter the way things play out and a time limit which means you simply can’t hang around. It’s a race to the finish, where you’re always scrabbling to get time back and coming up with unique strategies on the fly to overcome the obstacles that each week’s modifiers present.
So all in all, Nightfall Strikes are for end-game Guardians who relish a challenge and are on the hunt for some Powerful Engrams. Completing them goes towards your Milestones and Clan rewards and in our opinion it’s some of the most fun we’ve had with the game. Get your fireteam together and take one on!
Nightfall: Modifiers
The modifiers affecting The Pyramidion this week are:
- Torrent
- Time Warp: Zero Hour
Torrent – Here’s the official description: “Boundless power erupts from within. Your abilities recharge much faster. Use them to shatter your foes.” This modifier means that you’ll have an absolute blast with this Nightfall Strike. There’s simply nothing better than being able to launch grenades and spam your class abilities with giddy abandon!
Zero Hour – This one’s pretty simple: “The mission timer cannot be extended. Choose your battles carefully.” For this week’s Nightfall Strike, Bungie have done away with jumping through hoops and shooting anomalies to gain back precious seconds. In many ways, this actually makes this Nightfall a lot less stressful as you don’t have to worry about anything other than ploughing through in the given time limit.
Nightfall: Tips and Tricks
Before you begin, it’s incredibly important to get your subclass loadouts right to ensure you’re outputting the most damage possible. Below we’ve listed our personal favourites that are perfect for taking advantage of the Torrent modifier.
- Warlocks: We recommend going for the Stormcaller with Attunement of the Elements and Pulse Grenades equipped. You’ll be exceptional at clearing mobs of enemies with your electrified fingertips and Pulse Grenades are your best bet for reliable, consistent damage. What’s more, Arc Soul Rifts can elevate your team’s damage even further and is generally more beneficial than the other skill tree.
- Titans: It’s worth going down the Striker route, with double Pulse Grenades equipped. With the Torrent modifier, this means you’ll constantly have Grenade uptime and it makes for some insane damage.
- Hunters: This one’s a little more flexible, but we’d recommend going down the Nighstalker, Way of the Trapper route. This ensures you’ll be doing huge damage to the large groups of Vex in the Pyramidion and generating tons of Orbs for your fireteam. If you’ve got the Orpheus Rig Exotic Armour – even better! With these super-powered greaves you’ll have near unlimited Super charge when hitting large mobs.
Fight into the Pyramidion
From the get-go, hop on your Sparrows and power it over to the Pyramidion’s entrance. Stick together for survivability and hop onto each ring to get them started. Remember that Torrent (Torrential Light) is active, so use your grenades and class abilities with giddy abandon. Whenever you see a cluster of enemies – grenade them!
Titan Barriers and Warlock Rifts are great to drop on each ring as you’re activating them as they make sure you’re chance of going down in pretty slim. Once you’re done with the rings, go about sweeping up the Vex in the area.
Enter the Pyramidion and Defeat the Taken
Dash your way through the winding tunnels until you get to a pack of Vex. Grenade them on sight and descend down the platforms below. We recommend grenading each cluster as you’re gliding down and sticking together when you land.
When you land they’ll be weakened, so hit them with another grenade and some melee hits if you can. Once each platform is cleared, descend down and sprint through the laser beam tunnels, taking care of the one Phalanx who’ll be blocking your way.
Eventually you’ll emerge into a large open area filled with Taken. You’re aim is to take them all out, so it’s worth using one or two Supers at this stage and swiftly wiping out as many as possible.
Your primary aim is to survive and deal damage though, so don’t get too aggressive! Keep grenading absolutely any mob or enemy you see and peppering them with your weaponry – they’ll go down in no time.
Proceed through the gate and make your way – carefully – through the next set of laser beams.
Activate the Altars
It’s another round of sitting in some rings, except this time it’s a bit trickier.
Again, stick together and get on these altars as soon as you can. Throw grenades at enemies and consider using a Super to clear a particularly tough wave of Vex. There’s not much else to it really, so long as you don’t stop lobbing explosives into the fray.
Also get into a habit of activating your rifts and barriers constantly too. This will make this section far, far more manageable.
When you’re done and the objective updates, simply ignore any remaining enemies and leg it through the warp gate.
Traverse your way through the moving laser beams, being careful not to get taken out. It’s pretty vital that you’re all present for the next section of the Strike.
Around midway through this part, you’ll come up against a Taken horde. Avoid sprinting through and fight through them instead. We recommend hiding behind the pillar at the back and chucking grenades/shooting the Taken until they all drop.
Hack the Network Towers
You’re nearing the boss, so keep a cool head and make sure you rally together for this tricky part. When you start off, take cover and prioritise the Hobgoblins up top. Once they’re down start grenading the mobs closest to the towers, hacking them as soon as you can.
Make your way up, using the Vex constructs as cover. We recommend hacking the tower on the lower platform second as you’re unlikely to come across much resistance.
To complete the remaining two, we ran together and dumped grenades on each mob near the towers, ran in and hacking instantly before retreating slightly. This ensures you’ve got the hack going and that you’re not getting into melee range for too long.
Once they’re done – sprint through the warp gate and into the boss room.
Destroy the Genesis Mind
As soon as he spawns in, retreat, split up and hit him in the head until he teleports away.
He’ll begin spawning a number of mobs in and you’ll have to activate a couple of rings to release him from his cage. Split into two teams and hop into each rings, dropping rifts, barriers – the lot.
Barriers and Rifts are fantastic ways of blocking damage and sustaining through all the damage that’s going to be thrown at you. As soon as they’re off cooldown, make sure to use them!
Clear the mobs with grenades and Supers, supporting each other from across the room.
Rinse and repeat these scenarios until he goes awol and starts running rampant around the room. When he does, spam grenades at his feet and let loose with Supers or power weapons. If you’re getting a little overwhelmed, destroy some of the mobs spawning around the arena and even pop a Super to speed up the process.
Although it’s a bit risky, focus on blitzing his health bar with damage and he’ll go down pretty quickly!
NORMAL MODE WALKTHROUGH BELOW
The best way to deal with the opening section of The Pyramidion is to have your best-equipped (read highest-survivability) team mate get up close and personal with the mass of Vex enemies, while the rest of the team stays back a little and focuses on long-range sniping damage.
Watch out for Hobgoblins on top of the pillars, and get some time in the light altars whenever things quieten down a little – this will speed up the time it takes for the unlock to be completed.
Our most popular Destiny 2 guides:
The following links will take you to all of our Strike guides
- 1. Strikes – Destiny 2 Strike guide
- 2. Nightfall Strikes – Destiny 2 Nightfalls Strikes guide
- 3. Exodus Crash – Destiny 2 Exodus Crash guide
- 4. Inverted Spire – Destiny 2 Inverted Spire guide
- 5. Lake of Shadows – Destiny 2 Lake of Shadows guide
- 6. Pyramidion – Destiny 2 Pyramidion guide
- 7. Savathun’s Song – Destiny 2 Savathun’s Song guide
- 8. The Arms Dealer – Destiny 2 The Arms Dealer guide
Clearing the Colossal Steps and finding the first Warpgate
Colossal Steps
Pick off the Goblins protecting this area as you head forwards, but do be aware that as you drop down onto each step you’ll have to deal with spawns of creatures such as Goblins and Minotaurs. Slow, steady and methodical is the way to take this section, and deal with each pack independently before moving on.
You might want to tackle this section the same way you coped with the starting area, and have your highest-survivability teammate get stuck into the thick of battle, while the rest of the team remains one step higher and provides ranged support. Just keep leap-frogging your team through this section until you’ve cleared the whole lot.
First Warpgate
In the next area you can see the warpgate you need to reach just beyond an archway, but before you can get there you’re going to need to pick off the Harpies and Goblins littering the immediate vicinity.
You’re about to encounter a larger-than-normal pack of Goblins, a pair of Minotaurs and some more ultra-tough Harpies too. If you’ve got a Super to hand, fire that sucker up to make life much easier, and make use of your grenades too.
Once you reach the warpgate you’ll encounter a large pack of Harpies, and the gate won’t be activated until they’re all dead. Clatter through them, then use the warpgate to proceed into the next part of the Pyramidion.
Navigating through the Altar Room laser traps
Altar Room
You’re going to need to navigate through some painful laser traps here, so just wait for each one to deactivate before moving forwards, and take this section as slowly as you need to – especially on your first play through the Strike. They will switch on and off, so don’t dawdle at any point.
Once passed this section, you’ll need to activate some Vex pillars again. The room is heavily guarded though, so make sure you thin down the number of enemies first, and snipe any Hobgoblins you can – these can cause a real problem if you don’t deal with them quickly.
When the room is more manageable, have two players activate one of the pillars, but be ready to fight a load of new enemies straight afterwards. Each activation spawns a number of new enemies, and so you need to quite methodically clear the room as you light up the pillars.
Once you’ve switched on all three pillars, an intimidating Hydra enemy will spawn and it is highly recommended that you save a Super or two for this comparatively tricky encounter. It’s not impossible to complete with regular firepower, but it will take a lot longer.
If you’re attempting to demolish this Hydra without a Super, make sure you’re using the environment to your advantage. Take cover behind the Vex pillars and peek out constantly, outputting damage directly into his eye. Don’t get too carried away, as a couple of shots from his purple, repeating cannon can eliminate you almost instantly.
Stick with it, and when this enemy has been defeated, you’ll be able to pass through the next waypoint.
Clear the rotating lasers and defeat the Cyclopses
Conduit
This is a fairly vanilla section to clear, although once again watch out for the laser traps that are peppered throughout the area. You also have to deal with the usual assortment of Goblins, Hobgoblins and Harpies. As always, focus the Hobgoblins first.
When you need to clear the laser section, run continuously through the rotating danger and you should be able to pass through the lot of them cleanly in one action. When you reach the end, simply drop down.
Tower Platform
In this platform section you should be able to see two platforms ahead of you, and these feature your first encounter with the Cyclops enemy archetype. You also need to handle the various enemy spawns (Goblins and Minotaurs) as you approach and hack each one of the network towers in this section.
Be very conservative when it comes to clearing this area, and ensure the team moves as one to each tower, dealing with the challenge at hand fully before moving on. It’s recommended that you have one of your team members initiate the hack itself, while another mops up any remaining enemies and the third both assists and looks for the next tower.
Our most popular Destiny 2 guides:
The following links will take you to our most important guide hubs:
- 1. Guide – Destiny 2 Guide
- 2. Crucible – Destiny 2 Crucible PVP guide
- 3. Subclasses – Destiny 2 Subclass guide
- 4. Strikes – Destiny 2 Strike guides
- 5. Campaign – Destiny 2 Campaign walkthrough
Tips, tricks and tactics for dealing with Boss Hobgoblin
Pass through the waygate, jump down into the chamber and make your way to the final altar, but be aware that when you arrive you’ll trigger the spawn of the Boss Hobgoblin, your final encounter of the strike.
Before you get take on the Genesis Mind, it’s important that you bring a rifle of some kind into the fight. We highly recommend equipping a Scout Rifle, or at least having a Sniper Rifle in your power weapon slot. These weapons will allow you to put out accurate, consistent damage to the boss’s eye. Other close range gear won’t cut it as the boss positions itself far away from you most of the time, making it difficult to land max-damage critical hits.
Genesis Mind: Phase One
Position yourselves in such a way that you can make use of cover opportunities in the vicinity, and then starting firing off damage into the boss’s head the moment it comes into view. Throw everything you’ve got at him – your weapons, your grenades – and keep the onslaught up until he retreats and throws up a white defensive shield.
When this happens, a load of Goblin enemies will spawn and which you’ll have to just deal with as quickly as you can. At some point, an altar circle will appear which you should all stand on in order to neutralise the boss’s protective shield.
More enemies will spawn as well as another circle, so kill the lot of them and make your way to the new circle in order to turn it on. Doing so will eliminate the boss’s defensive wall, freeing the team to continue bringing the monster’s health down. Just keep in mind that you can lose your established cover during this stage of the encounter, so be ready to back up into range and switch to a more appropriate weapon.
This is an excellent opportunity to make use of your Supers, so just keep throwing everything you’ve got at the enemy’s weak spot whenever the shield is down. If you see him glow, be ready to strafe out of the danger that’s coming your way.
You’ll need to drop the shield a handful of times before the boss finally moves into his final phase, and you should be aware too that the enemy spawns can get a little more complex as well, with even Minotaurs showing up to make life that little bit more difficult.
Genesis Mind: Phase Two
When he’s lost approximately one third of his health, the boss will go into a frenzied state and your best option is to seek cover and pepper him with whatever damage you can from your position. When he takes a certain amount of damage he’ll teleport away, so Supers – while tempting – can prove less effective here than you might think.
Call for your fireteam to split up, as this proves crucial for the rest of the fight. It’s important because the Genesis Mind is only able to target one of you, meaning the other two can take aim at his glowing yellow eye.
He’ll also throw an icky substance at you which covers the vicinity. You need to get out of this stuff as quickly as possible, while also being mindful of the many Goblin enemies that are spawned while the boss is in this state.
It may seem tempting to ignore the Goblins, but don’t underestimate the trouble they can cause. We recommend thinning the numbers as quickly as possible, and using your grenades on the mobs instead of the Genesis Mind. Why? The boss teleports and moves too frequently for your grenades to reliably hit, or to at least deal maximum damage. They’re best used to clear the clusters of enemies who chip away at your health bar.
Genesis Mind: Phase Three
When he’s down to his final third or so of health, the Hobgoblin really goes into overdrive and will summon Goblins, Fanatics and Harpies to assist in the destruction of your team. He’ll position himself in the center of the arena here, so move away to the edge of the platform and spread yourselves out. Now it’s a case of concentrating fire on the mobs from this position.
We’ve had success prioritising the Fanatics first, before moving onto the Harpies next. The Fanatics explode on death, creating an electrical field on the ground that can soften up the rest of mob, while the Harpies can deal a surprising amount of damage if you aren’t careful – do away with them swiftly.
When you’ve dropped a good number of the summoned mobs, turn your attention to the boss’s head. Now’s the time to use any Supers you’ve got, as well as equipping those power weapons and letting loose. Just ensure that you’re split up to avoid death and you’ll eventually take his head off. Once this happens, turn your attention to his torso and keep dishing out damage until he – finally – drops dead to the floor.
